

As promised in my earlier post about how to DIY the fall leaf garlands shown here (as well as a fall wreath), here's the tutorial for the frosted lanterns that are pictured!
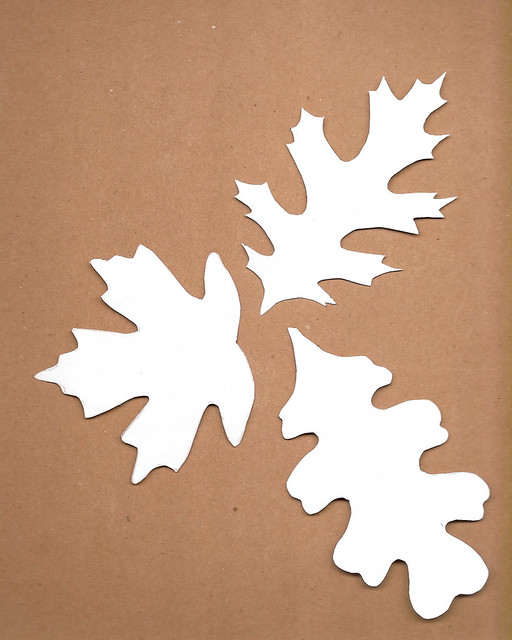
Just use the same leaf outlines from the previous tutorial (personal use only, please!), make your own, or find leaves you like online and size them to whatever you like. Then trace around them onto contact paper. I used clear, but it really doesn't matter for this project. You will need contact paper, though, so that you can adhere the edges to the jar and keep etching cream from going under them.

For one lantern, I cut out the leaves. For another, I cut the leaves themselves out (stencils not shown, but the jar in the first photo shows you what this looks like). For the following pictures, I'll be showing you the ones with the leaf outlines.

Peel off the backing paper, and start arranging your stencils around a clean, uncoated glass jar. Using rubbing alcohol to clean the jar helps ensure that there's no soap or other residue to keep the paper from sticking properly. Make sure the jar is thoroughly dry as well. I used a wide-mouth, large Mason jar for mine.
I decided to stagger the leaves, putting one first near the bottom and then one near the top. I repeated this around the jar.

For the oak leaves, I initially had trouble getting the edges to lie flat. So, I snipped through the end of the stem. Having an "open" stencil let me curve the edges of the stencil more easily to fit the curves of the jar while still getting an accurate leaf shape. When you get to the stem end, just bring the two ends near each other again to get a nice thin stem. If you mess up, just unstick the paper and try again! It's very forgiving.

Use a dull edge (or screen print squeegee, like I did) to make sure your edges are completely flat against the jar and sticking along the entire length.

Here's another oak leaf near the top. Now that all your stencils are on, take your etching cream and follow its directions for application.

Etching cream works best for small areas. For the lanterns where I used leaf cut-outs, I had a harder time getting an even etching since there was so much open space. The cream definitely worked better for this version. Make sure you apply a nice thick coat and get all open areas of the stencil. You can go over the edge to do this, just try to use more of an up-and-down motion so you aren't pushing cream under the edges.
Make sure you follow the safety directions for the cream, especially the parts about ventilation and what to do if you get it on your skin!

Follow directions for the wait time (confession: I tend to leave it on for a minute longer or so because I like the look better) then wash off the cream and remove your stencils. Let air dry.

Here's your final result! Just pop in a candle (I like LED ones so you don't have to worry about fires) and enjoy the warm, autumn glow.
No comments:
Post a Comment