
If you saw my DIY bracelet post featuring gold tube beads and leather, you may remember that I promised a bonus project to use up your extra leather cord.
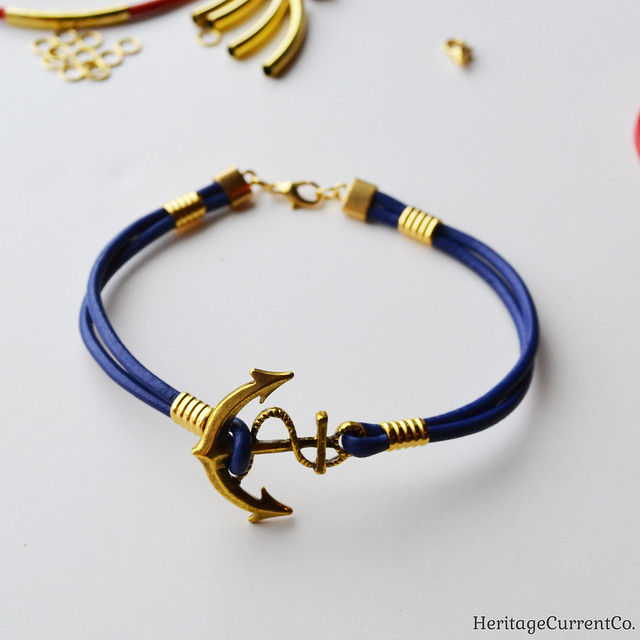
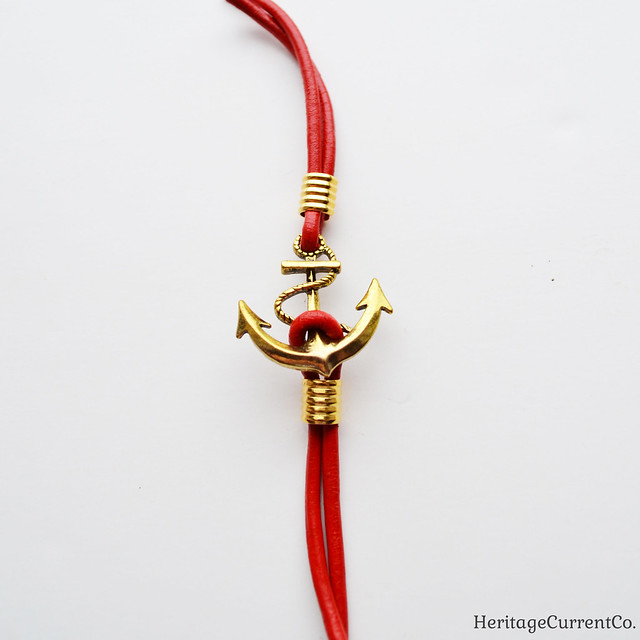
I used my extra pieces to make this anchor and leather bracelet in two colors. It's just as easy as the original project!
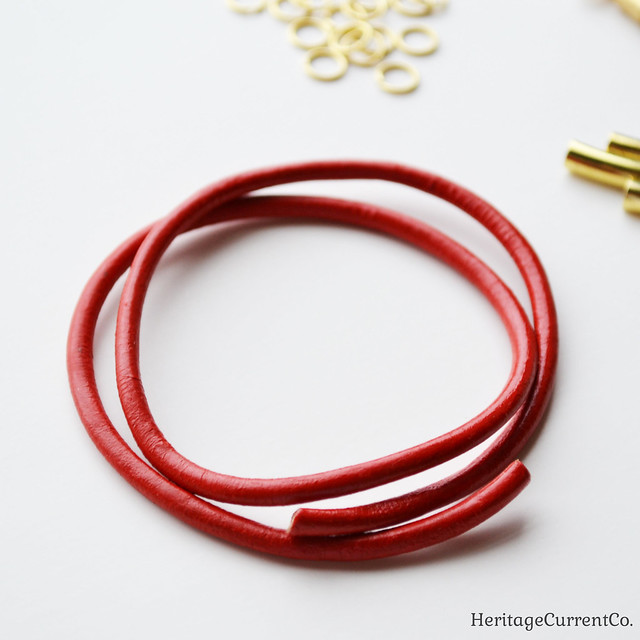
Take your extra cord, and measure around your wrist. You can make it fairly snug, or larger like a bangle. Up to you! Sometimes I do this with a piece of twine or other string, instead of using the cord I'm going to be cutting.
This is the total length of your anchor charm, end caps, jump rings, clasp, and cord. It helps to lay everything out on your work surface. For the lengths of cord on either side of the anchor, you'll want to double them and note that some of the length will be inside the end cap (so add a few millimeters if you want the bracelet to be snug).
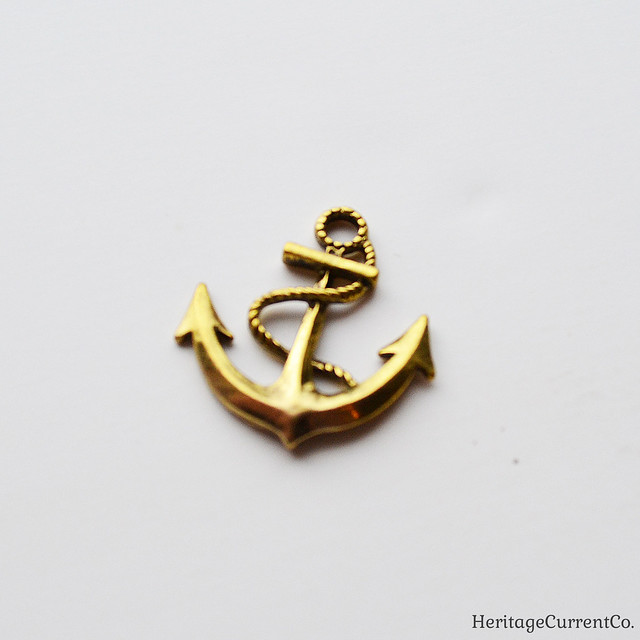
I decided to go with this gold anchor charm, since it had space on both ends for me to string cord. I'll be stringing the round leather cord through the loop on the top, and around the prongs at the bottom of the anchor.
I used gold because I like how it contrasts with red and blue, but you can use whatever metal color you like.
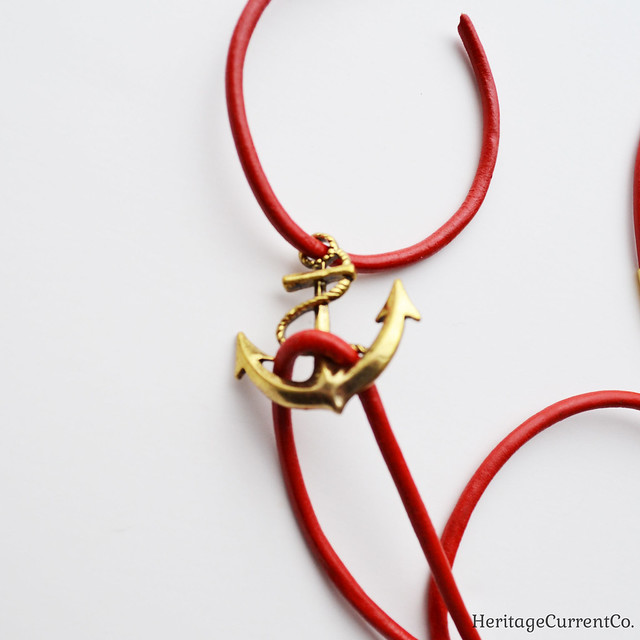
Take your two lengths of cord, and string them as shown. Don't worry about making them completely even - you can do that in the next step.
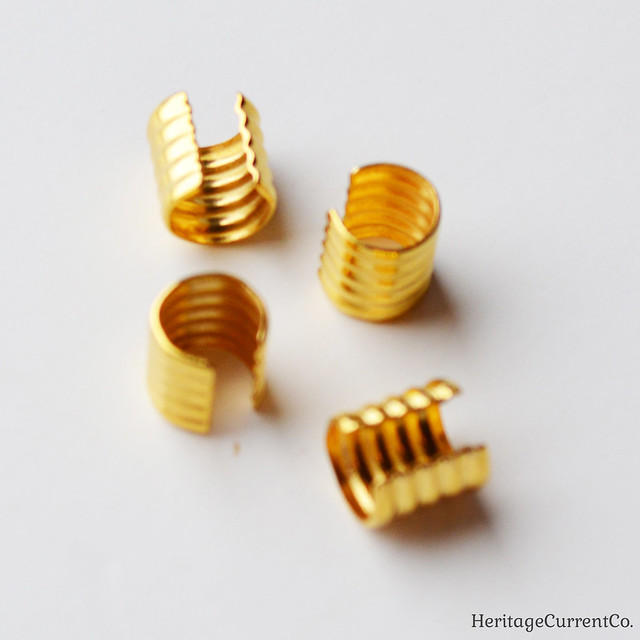
Find some gold tube crimp beads. These ones are 7.5mm on the inside, so they were wide enough to accommodate two widths of my 3mm cord.
Even up your cord lengths so they are folded perfectly in half. Add a crimp bead near where you strung your cord on either end, and use needle-nose or jeweler's pliers to tighten. Be careful not to tighten too much, however. You want the two sides of cord to lay flat next to each other, rather than stacking on top of each other.
Also, don't put a crimp bead too close to the prongs at the bottom. Leave a bit of space so that the anchor charm will lay flat when you wear the bracelet. If you put the crimp bead too close, it will end up right under the anchor charm instead of next to it, and won't look right.
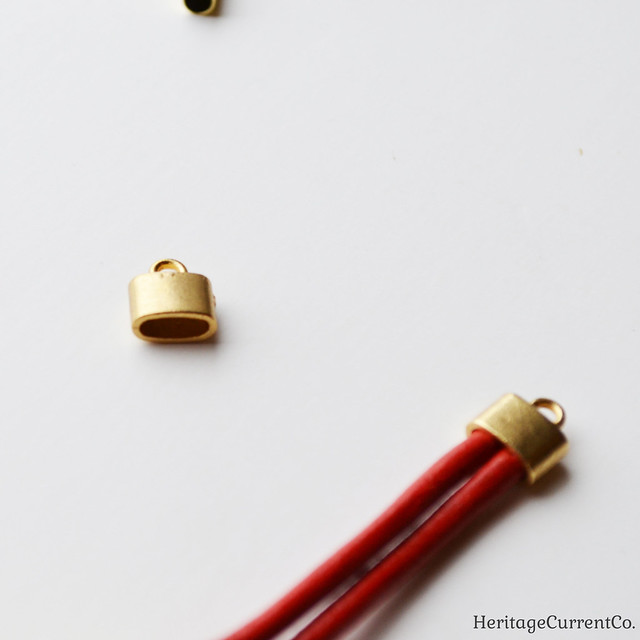
Add your end caps, as described in the gold tube and leather bracelet post. Let the glue dry thoroughly before moving on to the next step.
Add jumps rings and a clasp to the end caps, and your bracelet is finished. You can see the blue version I made here.
This nautical-themed bracelet is great for summer, but also works well for adding a touch of the sea and ocean to your outfit year-round. Like the gold tube and leather bracelets, this anchor bracelet would make a thoughtful handmade Christmas or holiday gift!
No comments:
Post a Comment