Showing posts with label diy. Show all posts

June 1, 2016

DIY Spring/Summer Tulip Wreath


Just wanted to pop in and share this easy DIY tulip wreath I made using faux blooms from Michael's! I used 8 pink tulips and 5 white ones.

First, select a wreath form. I used a bent wire one for mine but grapevine would work too. Next, cut your flower stems to about 6 - 8 inches and strip off the leaves. This gives you enough to bend around the form to support the bloom, without having tons of extra that will bulk up the form. 

Arrange and stagger your stems around the form, wrapping with florist or other strong wire as you go. I finished with some white grosgrain ribbon wrapped so as to hide the wire, then glued at the beginning and end with Tacky Glue to secure it (the glued parts are hidden behind the bow at the bottom).


I used the discarded leaves to make a bow, bending them in half to form the loops (3 per side). I cinched the loop ends together and wrapped a thinner strip cut from a leaf around them to gather them together. I secured the middle strip with more glue, then glued two more thinner strips with notches cut into the ends hanging down as the bow's "ribbon" ends. When the bow was dried, I glued it to the wreath frame.

That's it! Simple and easy. You could substitute whatever flowers you like - peonies, roses, forsythia, wisteria, or poppies (one of my other favorite flowers!). Use lots of blooms or just a few, all one color or a mix of everything - the possibilities are endless!
 

April 7, 2016

Easter Knitting Projects


Any fellow knitters out there? I started knitting when I was in middle school, completing a few horribly mistake-ridden garter stitch items before dropping the hobby for well over a decade. I've picked it up again in the last few years, spurred on by photos of cute baby items on Ravelry, and now I have a giant stash of yarn hidden under the bed.

Even though I've hit that stage of pregnancy where I'm just utterly, completely *exhausted*, I still managed to surprise myself and complete a few Easter-themed pieces. (Next on the docket: baby sweaters before it gets too warm to knit much!)

The eggs in the top row above are an Arne & Carlos pattern, from their book "Easter Knits". I rented it from my local library, and followed the flower patterns exactly as written while modifying their chick chart for a ball into one for an egg instead. I loved this pattern, and the shape of the eggs! I used LionBrand Bon Bon yarns, so I wouldn't have a ton of regular fingering weight skeins sitting around (I'm attempting to use up my stash these days).

The eggs in the bottom row are a Julie Williams pattern. This pattern is available for free online, but I wasn't as pleased with the results. I noticed first and foremost that the eggs featured in her pictures don't always conform to the charts. They seem to have rows added. I added some rows for at least the gingham one here as she did (I forget if I added ones to the striped egg.) I also modified the top shaping a bit, to be more egg-like. I knit them in the round as well, because I avoid seaming like the plague (one of these days I'll get over that and knit my first adult sweater!).

I still think they came out a bit too fat and not very egg-shaped. Oh well!


You need a rabbit to go with your Easter eggs, right? This bunny is a Rachel Borello pattern. I think it turned out okay. The head seems a bit huge and the face isn't as rabbit-like as I wanted, although I did use embroidery thread for eyes instead of the safety ones suggested. Looking at people's project pages, it seems like I wasn't the only one whose bunny didn't come out very close to the original though. I think she used a fish eye lens or something like that to make hers resemble a rabbit more.

It was also very fiddly to knit - each element is a separate piece that required stuffing and/or seaming. I don't think I'd attempt this again.


This chick is a free pattern from Nicky Fijalkowska. I was originally going to make one of the above Easter eggs as two halves, and hide it inside. However, once I started knitting one this way, I realized each half wouldn't have enough structure to maintain an egg shape. So this little guy is homeless, but still cute! I like how the wings curl.

What are you knitting lately?

March 28, 2016

My DIY Version of Purl Soho's Heirloom Wool Easter Eggs


Did you guys see Purl Soho's Heirloom Wool Easter eggs pattern? I thought they were nice, but I wanted a thinner version with more colorful flowers. So I decided to wing it and DIY my own.


I started by making a template out of paper. (Save this image, print out at whatever size you like, and use as a template for yours if you like it.)


I then cut twice the number of egg shapes as eggs I wanted to make out of plain white felt. You can use the good wool stuff, but I honestly prefer the polyester - it won't get eaten by moths or carpet beetles over time.

Then cut another template out of paper, but take about 3 - 4 mm off all around. Use this template to cut smaller egg shapes out of thin quilt batting, one per egg.

Then you can either hand-stitch these using blanket stitch, or use a sewing machine to sandwich the batting in between two egg felt shapes and stitch all the way around. If you look closely, I tried out a few different stitches for mine - a small zigzag, a wider zigzag, and some plain stitching. Make sure you catch the back piece of felt as you sew. You can use a walking foot if you have one, but I did these without it - I just went slowly.

Don't worry about it being perfect though! I had some spots where the back piece of felt stuck out from behind the top piece. Instead of redoing it, I either trimmed it with scissors or just put flowers over this spot.


Now for the decorating! I decided to make loops out of thin blue ribbon for hanging. I stitched them on the back side of the egg. (In retrospect, I should've sandwiched them in when I sewed the eggs, but oh well!)

Then I cut petals out of different colors of felt. Many flowers can be broken down into simple shapes. This pansy is just two bigger ovals, two medium ones, and a really big one that's almost pinched into a triangle at the top out of purple felt. Then cut two small ovals and another medium oval out of a contrasting color (here I used yellow). Then layer your petals as shown and stitch on using embroidery thread.


For this one, I drew a five-petaled flower, cut it out, and then turned it over so the pencil lines wouldn't show. If drawing isn't your thing, just do a basic five-pointed star then nip a bit more out of the petals near the center to give them a better shape. I layered a smaller flower over a larger one for the middle bloom. These were stitched on using pale pink embroidery thread and tiny stitches.


Violets are one of my favorite spring flowers! These are just two smaller ovals on top with three larger ovals on the bottom. I stitched the petals on with purple thread, then added bright yellow centers.


I got a little fancier with this one. It's just two purple cones and a larger pink oval for the pink hyacinth and purple grape hyacinths. I stitched little flower shapes in pink for the middle part, then just did lots of French knots (do a Google image search to find step-by-step tutorials!) for the side flowers.


Here you can see the other bluebells, abstract round flowers, and orange-centered daffodils one I made. Just play around with colors and your favorite blooms to customize these!

February 23, 2016

Belated Christmas Crafts Part II: DIY Vintage Reflector Wreath


For Christmas, I finally got around to making a wreath out of vintage reflectors. These decorative shapes cut out of metal (I believe either aluminum or tin) were manufactured to fit big old-style Christmas bulbs and reflect the light outwards. The ones I found on Ebay and Etsy came in pink, blue, silver, gold, green, and red.


Some came attached as doubles, and some were singles that I had to mix and match myself. They tend to be in star, flower, or starburst shapes.


Since I didn't take pics along the way (crafting with a kid who might wake up from his nap any second is more about speed than anything else and winter light is awful anyways!), here's a rough guide to how I did it:

*First, buy some vintage reflectors. I sourced mine on Etsy and Ebay. They aren't cheap as they're currently very popular, but you only need 9 double or 18 single shapes. (I had enough leftover from the large batches I bought to make a wreath for my mom as well. Lucky her!)

*.Buy a cardboard wreath frame that's fairly sturdy. I got mine at Papersource. (Dangerous store to walk into - you've been warned!) Pick a paint color you like, and paint your frame. I went with white. You'll probably need a couple of coats. Let dry between coats.

*Buy a short strand of LED lights. I think my strand only had 12 lights. Since we're working with paper and glues, go the safe route and use LEDs. They don't heat up so the fire risk is very low. Obviously, don't leave lights on when you leave your house/apt. I found ones with a battery pack from Home Depot for less than $10. (However, they turned out to be TERRIBLE and I'm currently trying to find a better replacement. I'll talk about this more later.) I went with a battery pack so I wouldn't need to hang it near an outlet, allowing me to display it on a door. Just hide any extra length on the back of the frame or loop it around, and then attach your battery pack to the back with glue or strong tape.

*If you have any singles you need to match up, use very strong glue to attach together. I want to say I tried hot glue at first but found it popped off over time. So I switched to a very small amount of Gorilla Glue. This stuff expands a LOT so try to put it on the underside of your inner shapes a bit away from the inner edge and not close to the outer edge so it won't show once it's dry. Follow safety directions on the glue.

*Lay out your doubles on your wreath frame until you find an order that you like. You want a good variation in both background/outer color and liner/inner color for your double reflectors. Make sure they're evenly spaced. You might have to spin them around so they fit together better (especially for the starburst shapes). I tried to do a sequence of three background colors, and then form triangles across the wreath of inner colors while also varying the shape. Buying extra reflectors can make this easier.

*Mark the inside opening of each with a pencil dot. Set aside reflectors.

*Be super-scientific/safe (sarcasm) and start each hole with a nail that you whack in with whatever heavy object is nearby. I might've used a stapler (don't be me: find a safer way).

*Once the nail is through to the other side, take your pencil and start working it into the hole. Get the tip in, then start spinning it around back and forth til the hole enlarges. I don't know why this works to enlarge the hole, but it does. (See: super scientific/safe process.) Have a firm grip on your frame so it doesn't buckle as you do this.

*Using a bulb from your LED strand to check the width of the hole as you go, enlarge until your bulb fits tightly into the space from the underside of the frame. You might have to pop off the top and just use the socket to get it into the hole from below, then you can replace the light from the top once it's in.

*Do this for every hole.

*Remove any lights, and glue on your reflectors around each hole in the order that you chose. I went with Gorilla Glue for this.

*Once it's dry, use an x-acto knife or other tool to remove any expanded glue you don't want to see. Paint any remaining bits/bits that won't come off your wreath color (so I used white).

*Replace lights, add batteries or plug-in, and hang! You could add a ribbon loop for hanging. I just banged in a nail and then rested the top of the inner circle of the wreath on it. Up to you!

*A note on the lights I used: a downside to LED lights is that they aren't as bright as regular lights. (You can barely see mine in daylight.) Mine also only lit up in certain areas, I think because of the way they hung when I put it up on the wall. So maybe buy a couple different strands and see what works best.

February 17, 2016

Belated Christmas Crafts 2015 Part 1: Glittered Putz Houses


Sometimes I have to let go and accept that between chasing a toddler, house-hunting, making time for my husband, and dealing with the constant exhaustion of pregnancy, I just can't post as often as I'd like. Someday, there will be time for more making and more posting and more, well, everything. But, for now, this is the phase of life I'm in and instead of fighting it and becoming frustrated, I just need to accept that this will pass (all too soon, can't believe how quickly babies grow up!) and enjoy the moments I have rather than the ones in my head that don't come to pass.

So here I am, for the second year in a row, posting my Christmas projects late. Apologies, but I figured if you plan parts of your life out up to a year advance (as I do, see: babies!), you might want to add these to your crafting calendar for next year.

If you look up Putz houses, you can find plenty of free patterns online. I chose a few that I liked, printed out the templates, traced them onto empty cereal boxes I'd been saving (they're a great cardboard weight), painted them white, and then brushed them with glue before sprinkling on clear glitter from Michael's. For the "snow", I just stretched and tore up cotton balls and arranged them in drifts around the houses. I like to put a flickering LED candle inside the church (on the left), so it glows at night.


One caveat: remember to cut out the windows and doors *before* you assemble and glitter these! I only remembered to do this for the church. The others don't have any windows or doors, and I can't cut them out now without crushing them. (I'm going to redo them for next year.)


April 24, 2015

DIY Easter Egg Dye


Intrigued by the many bloggers posting about natural Easter egg dyes, I finally caved and decided to try it for myself! Here are three white eggs I dyed using purple cabbage. I'll leave it to you to find an exact recipe you like. I basically just winged it, chopping up an entire head (minus the white core) simmering it for five-ish minutes in enough water to cover it before straining it and adding a couple tablespoons of white vinegar.

I submerged my eggs overnight, letting them cool for a bit in the solution before transferring them to the fridge for the rest of their soak.


This egg came out the darkest. It was a lovely deep, slightly teal shade of blue. I've read that if you leave the vegetal/natural matter in the dye, you can get a mottled look. I think I'll try that next time. A marbled effect would look great in this color!


For this egg, I arranged a few dried cherry blossom petals on a square of old nylons/pantyhose and then wrapped this square tightly around the egg, fastening it with a twist tie. I like how some of the dye went through the petals, giving them delicate veins. I was worried they'd just end up looking like giant white spots, but the little detailed lines prevented this!


This last egg came out slightly lighter than the others, for unknown reasons. I think it's interesting that you can get varying shades from the exact same dye bath. It's a nice variation in color without any effort!


I was under the impression that the hot dye, which I only let cool for a few minutes before submerging the eggs, would hardboil the insides. So when I went to crack one for an afternoon snack, I was very surprised to find this instead! I'll have to figure out what went wrong for next time. Perhaps I needed a larger volume of dye.


The remnants of my craft project, all crushed and ready for the compost pile or for dressing the garden! Even in this state, the eggshells are lovely to look at, don't you think?

Next on the agenda is homemade dusty pink dye from avocado pits! I've been collecting them to dye yarn with, but after seeing these results I can't wait to use the dye on eggs too.

January 9, 2015

DIY Gingerbread Man Christmas Ornament


I've missed posting here. I have all these ideas swirling in my head, just not all the time in the world to complete (or even start) them these days! Motherhood is very challenging and amazing, in the best way possible, but I'm still struggling to fit in "me" time. And blogging time (since very often those times are one and the same)!

I managed to get quite a few projects done in time for Christmas, but didn't get to post them here for you. So, with many apologies, I thought I'd post them anyways and if you like something you can plan on making it for next Christmas/winter. Not the same, I know, but hopefully still helpful!

This is a felt gingerbread man ornament I made as a gift for a relative. It was a little time-consuming (all those little stitches!) but very easy. I think it only took me two hours at the most. First, trace a gingerbread man shape you like onto brown felt (or whatever color you like). I based my shape on a cookie cutter, with a few modifications because he seemed to have an inordinately large head. Cut two pieces of your chosen shape, but I wouldn't fold over the fabric as it might be too thick to cut without warping. So, just trace two shapes and then cut them out.

Designate one as your "top" piece. On this one, use embroidery thread to stitch on as many or few details as you like, in whatever color you fancy. I chose arm and leg bands, eyes, and a smile. (I wanted to do them in white, but only had red. Oh well!) It helps to trace where you want your details to be with chalk or some other type of marking that you can rub off once you're finished, to make sure you like where things are placed before you embroider.

Then place your top piece over your bottom one, and line up your edges. Cut a long length of thread (I used white here) for the outline stitches. I chose to double mine up so the stitches would look thicker and show up better on the dark brown felt. Start above one of the shoulders, and neatly and evenly stitch around (going next to an arm, then the legs, etc.) until you get to the other shoulder. I think it's easier to start at a shoulder so that when you get to the other side, you'll be able to reach into the limbs so you can stuff them. If you start between limbs, you might end up at a crook where you wouldn't be able to reach back into an arm or leg very easily.

Lightly stuff your gingerbread man. I think I made mine about a quarter-inch thick. You want just enough padding to make your ornament a little 3D.

Stitch around the head, adding in a bit of stuffing as you go. Use a knitting needle or something thin to get in the last little bit of it before you finish your stitches and knot your thread on the backside. Finish by adding a hook, or some more embroidery thread (as I did) for a hanger. I cut about a 5- or 6-inch length, doubled it, threaded both ends through the needle (so the end of my thread was a loop), eyeballed the center of his head and pulled the needle through an inch or two, then removed the needle and knotted the ends together. Then I pulled the loop back the other way so the knot came up right against the back of his head. You could also pull the knotted ends over his head and through the loop, pulling tight so the loop cinches at the top of his head and your knot is at the top of the hanger (instead of the loop being there). Both would work!

July 15, 2014

DIY Button Badge Necklace - Prep Style/British Style


Finally back with a tutorial! I know it's been awhile, apologies for the rust. I don't know about you guys, but once the Fourth of July passes, I start looking forward to fall. Maybe it's because I don't adapt to scorching temperatures very well (my best coping mechanism is mass popsicle consumption) or maybe it's simply because autumn is my favorite season. At any rate, it already feels like back to school and cooler days are just around the corner.

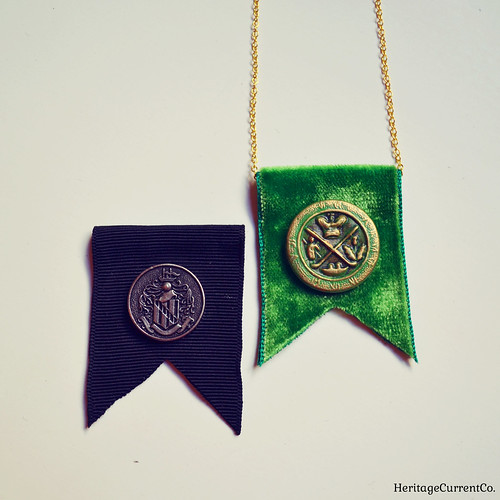
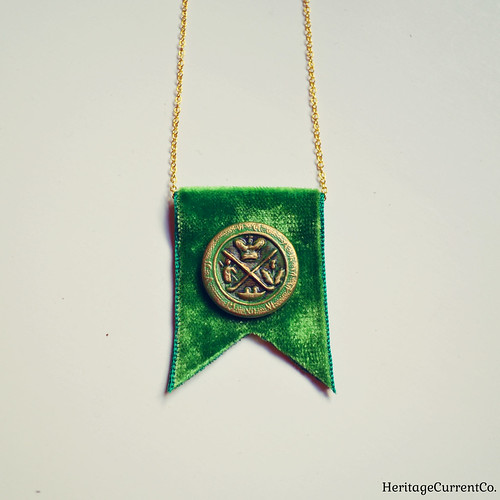
So, here's my contribution to the prep school style that will soon dominate! A simple badge necklace made with fabric, buttons, and chain that's oh-so-easy and easily adaptable to your personal style.


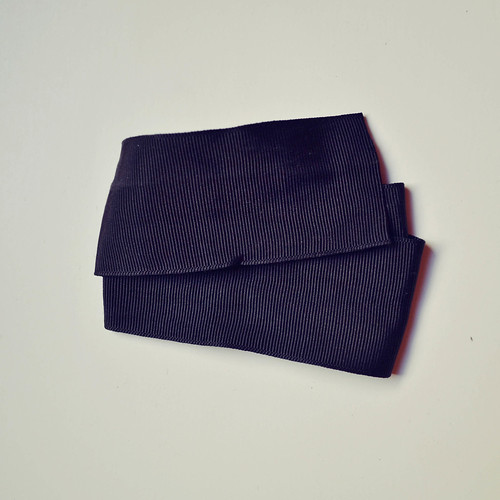
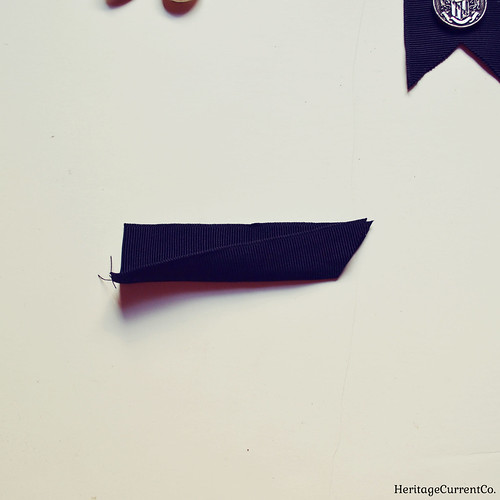
First, pick your ribbon. Here I have some vintage black grosgrain, although I also used the vintage green velvet shown in the previous photo.


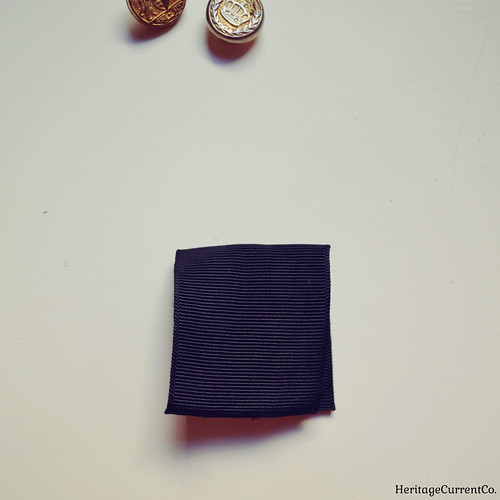
Cut a length of ribbon - I think I used around 3 inches. Make it as long or as short as you like, though! Then fold your ribbon in half and line up the edges.


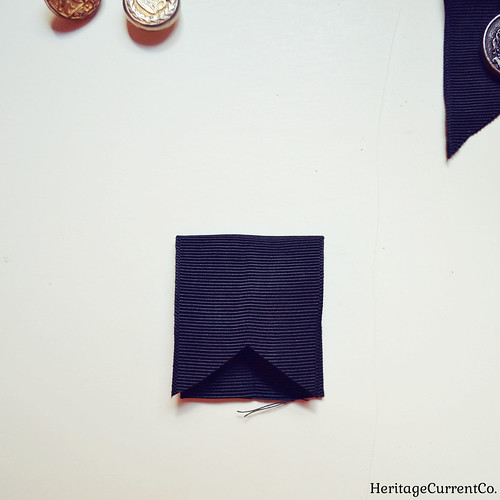
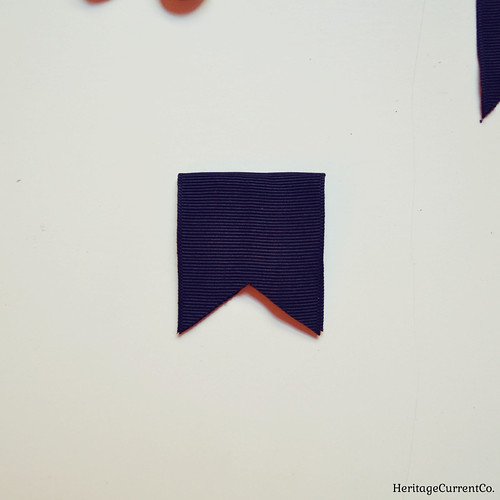
Measure your center point, and then snip out a triangle on the top layer with its top point at your center point. You can make the snip as shallow or as deep as you like. I made this one a bit shallow, but I think I prefer the deeper V of the green ribbon.


Fold your ribbon in half vertically, lining up the edges, and then use the first triangle you snipped as a guide to cut the bottom layer.


Flatten out again, and use your scissors to even up edges or make adjustments if necessary.


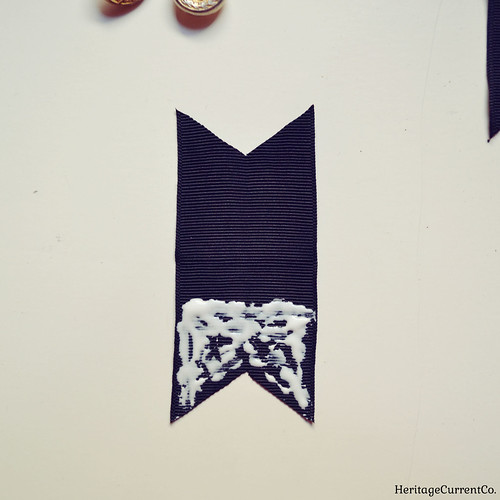
Open up your snipped ribbon, and slather fabric glue over the bottom two-thirds or so of your badge. Don't go all the way to the fold, as you'll need a space to thread your chain through. Try not to use a heavy hand as well, as the glue will flatten and spread out. Re-fold your badge, making sure the edges line up, and smooth out the fabric if there are any thick patches of glue. Let dry thoroughly. 


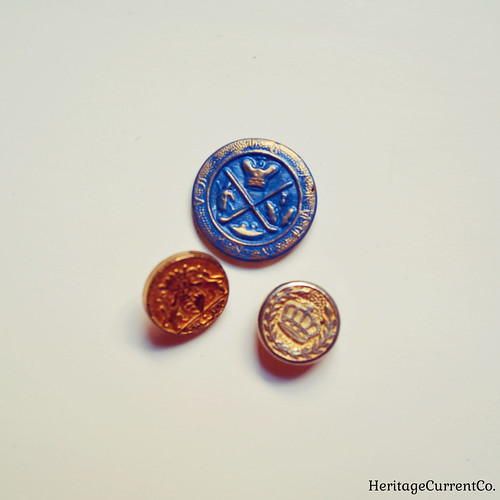
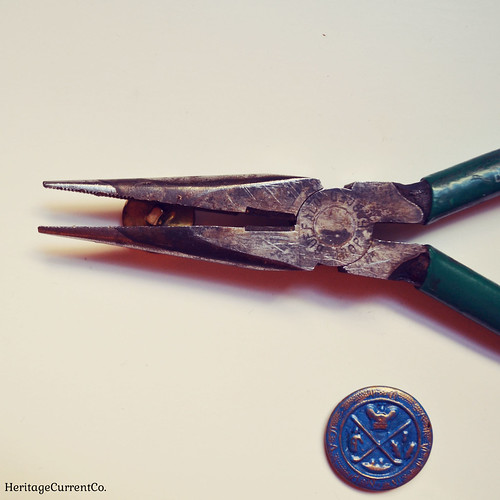
Now it's time to pick your button! I like metallic ones with heraldic-style images for a preppy/British look, but go with whatever you like. The blue Scottish-themed one shown here was originally a dark brass domed version that I flattened with pliers, painted blue, then gilded the raised details of with Rub 'N Buff. In retrospect, I think I would've liked it better domed. What do you think?


To make your buttons lie flat against the ribbon, use needle-nose pliers to take the back hole off. There's no one good way to do this, to be honest! I just kind of grip the sides with the pliers and twist/rock the button until it comes off. A file might work as well, or strong scissors. A lot of metal buttons are really good gold plastic fakes, so their backs will come right off.


Put glue on the back of your button, center it vertically and horizontally, then let dry. String chain of your choosing through the badge and add a clasp, and you're done! Gold and green is one of my favorite color combinations, so I love this one I made. I think I'm also going to create herringbone, tweed, and plaid ribbon badges.

If you had nautical-themed buttons, you could make very summer-y versions with gold chain, navy ribbon, and lobster or anchor buttons or charms. You could even substitute thin white rope for the chain for a sailor knot-style look. And with that, I'm off to the craft store...

November 12, 2013

Knit Pumpkins for October, Halloween, and Thanksgiving


When you live in a small city apartment with not enough closets for storage, you need versatile seasonal decor. I made these easy knitted pumpkins because I knew I could use them for both Halloween *and* Thanksgiving! That's also why I used brown and yellow-brown yarns. I thought orange might be too Halloween-y, while browns could work for both October and November.
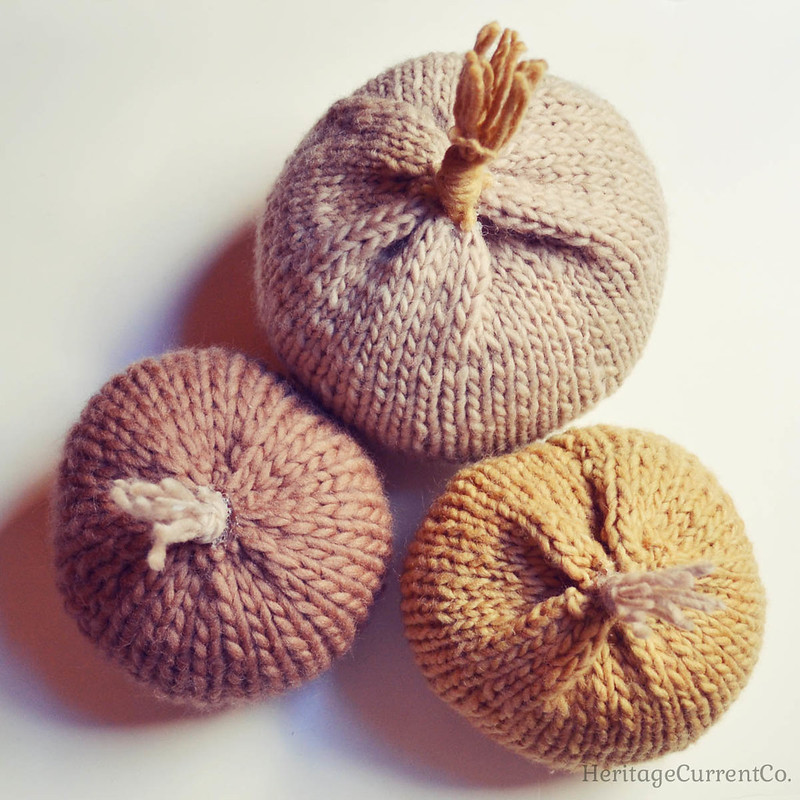
I loosely followed the directions for these knitted pumpkins. Scroll down and read the comments before you knit - helpful amendments have been added there! I made the two bottom pumpkins shown here using those directions, but varied my needle and yarn sizes. The larger pumpkin was made on larger needles, and I did 55 stitches across and I think about 30 rows.

I didn't have the right tools for the stems shown in the tutorial, so I cut about 6 - 10 pieces of yarn (depending on my pumpkin size) all the same length. Then I knotted them at the bottom to form a sort of tassel, trimmed the yarn beneath the knot, and then glued the "stem" onto the pumpkins with tacky glue. 

I'm debating whether or not to add veins like the original tutorial does. I think I like them as is so far!


November 7, 2013

DIY Chandelier Crystal, Lapis, and Gold Necklace


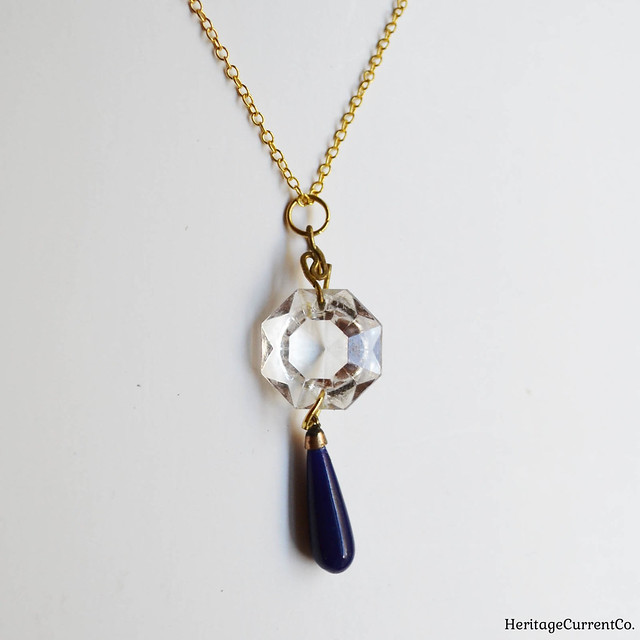
Like my DIY bead bar necklaces, this is another super-simple tutorial. Take an octagonal chandelier crystal with holes drilled on opposite sides (you can buy these online, I found mine in the "Supplies" section of Etsy) and then pick out a teardrop shaped bead. I used one that's about an inch long, and made of lapis-colored glass since I really like the combination of white, blue, and gold together. You could also go with a pearl drop, green glass drop, or even a gold one. You could use a round bead as well, but I think the teardrop shape balances out the octagonal crystal better - I think you need something longer than the crystal to give it a lavalier-type look.

My chandelier crystal still had one original hanging wire attached, so I simply slipped a large gold jump ring onto it and then closed the loop. The crystal also had a drilled hole at the bottom, so I simple slipped a large gold jump ring through it, added the lapis, then closed it. I strung this onto gold-plated chain, and instantly had an elegant, vintage-inspired necklace to wear. So easy, right? I think it looks very 1920s England/Downton Abbey-esque. What do you think?

Since you usually have to buy multiple beads at a time, the extras would be great for turning into one-of-a-kind holiday or birthday gifts for friends and family.

October 25, 2013

DIY Bead/Gem and Gold Wire Bar Necklaces


I don't know if I should actually call this post about DIY bead/gem and gold wire bar necklaces a tutorial, it's so simple that you really don't need more than a few basic instructions!

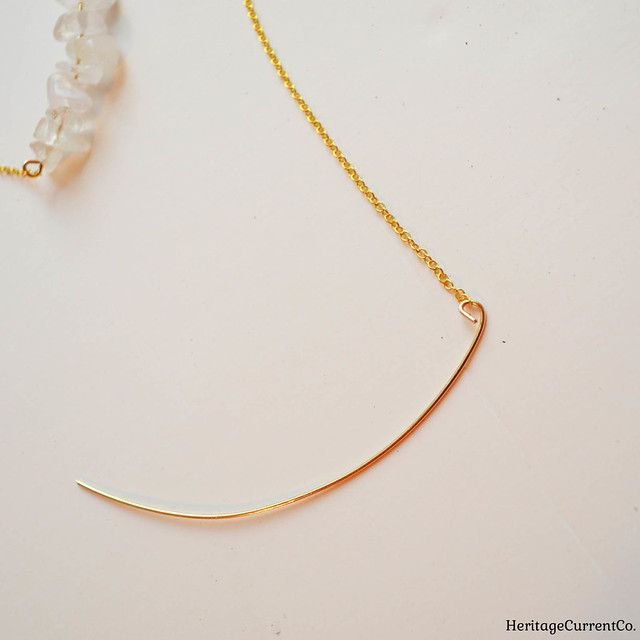
First, pick out some fairly thick gold wire. I used 40 gauge. Use something thick enough that it will hold its shape and not get bent easily with wear. Then select matching gold (either real, gold-plated, or gold tone - your choice!) chain. Make sure the links are wide enough to slip onto the wire.


Cut a length of wire with the wire-cutting part of your pliers. I usually do about three inches, leaving myself extra that I can cut off later. Take a pair of needle-nose pliers, and form a loop at one end, as shown. Slip the chain onto the loop, and tighten the loop to close it.

Then just add your beads! Make sure their openings are wide enough to fit onto the wire. In the first picture here, you can see I used some diamond shaped green glass beads and then irregular white quartz ones. Put on as many or as few beads as you wish. I made my line of beads about 2 - 2.5 inches long. Leave a bit of wire to form a loop, then cut off the extra. Form your second loop, doing the best you can to make it match the shape of your first one (you can fiddle with both loops after to make them match, or just leave as is - to be honest, people probably won't notice!). Before you tighten it, slip on the other end of your chain. Then close the loop. That's it!

I like my necklaces long, so I used about 30 inches of chain. Since this makes it easy to slip the necklaces over my head, I didn't need a clasp. If you want a shorter necklace that needs a clasp, I'd cut two lengths of chain and slip one end of each onto each loop, and then add your clasps. When you do this part, remember that one side of the clasp (the one with the hook you open) will be longer than the other. So, make that section of chain just a bit shorter so that when you line up each piece of chain with your clasp pieces, the total lengths end up being equal. Is this clear? If not, let me know and I'll add a picture!

Since these bar necklaces have sparkle and shine, they'd be make great accessories for holiday parties. They also make inexpensive, easy Christmas and holiday gifts for your friends and family!

September 28, 2013

DIY Anchor Leather Bracelet Tutorial


If you saw my DIY bracelet post featuring gold tube beads and leather, you may remember that I promised a bonus project to use up your extra leather cord. 

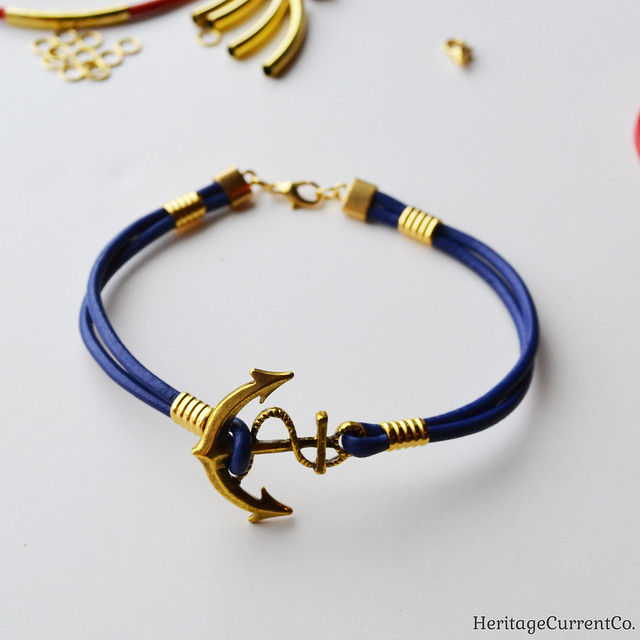
I used my extra pieces to make this anchor and leather bracelet in two colors. It's just as easy as the original project!


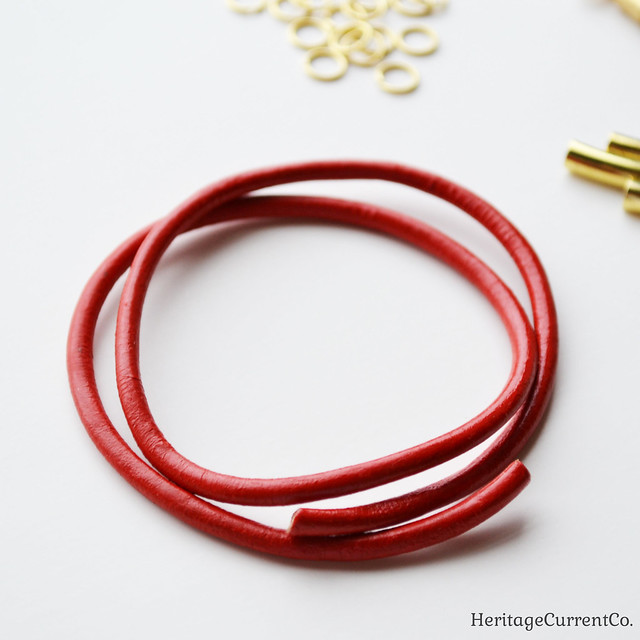
Take your extra cord, and measure around your wrist. You can make it fairly snug, or larger like a bangle. Up to you! Sometimes I do this with a piece of twine or other string, instead of using the cord I'm going to be cutting. 

This is the total length of your anchor charm, end caps, jump rings, clasp, and cord. It helps to lay everything out on your work surface. For the lengths of cord on either side of the anchor, you'll want to double them and note that some of the length will be inside the end cap (so add a few millimeters if you want the bracelet to be snug).


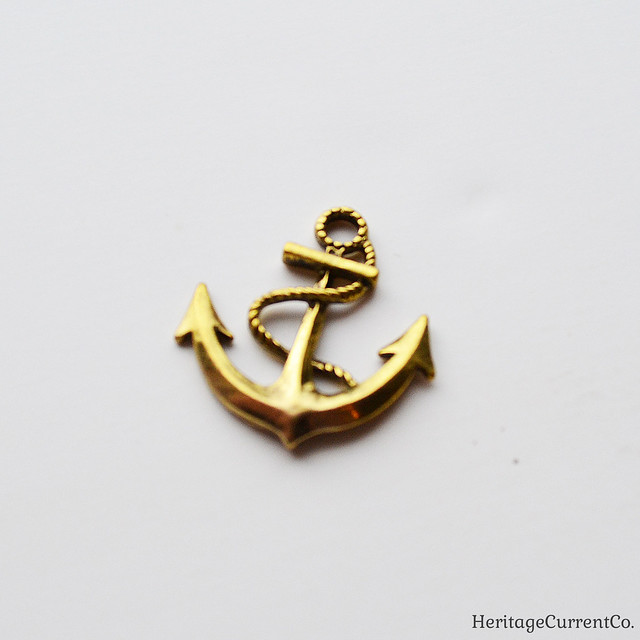
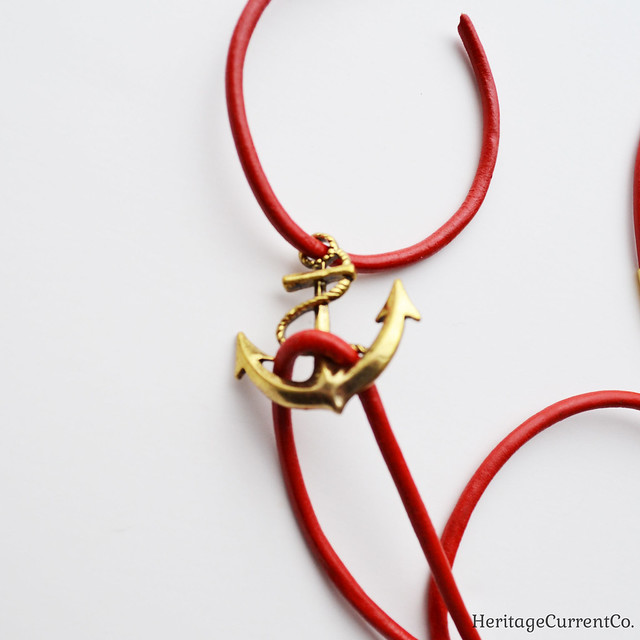
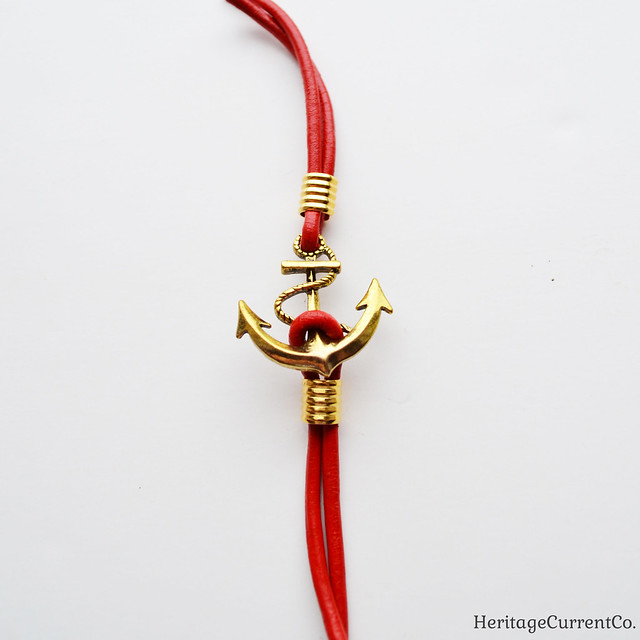
I decided to go with this gold anchor charm, since it had space on both ends for me to string cord. I'll be stringing the round leather cord through the loop on the top, and around the prongs at the bottom of the anchor.

I used gold because I like how it contrasts with red and blue, but you can use whatever metal color you like.


Take your two lengths of cord, and string them as shown. Don't worry about making them completely even - you can do that in the next step.


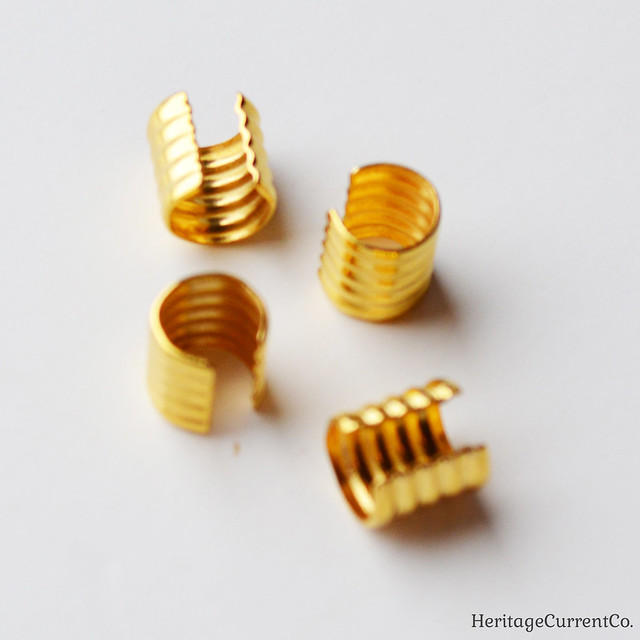
Find some gold tube crimp beads. These ones are 7.5mm on the inside, so they were wide enough to accommodate two widths of my 3mm cord.


Even up your cord lengths so they are folded perfectly in half. Add a crimp bead near where you strung your cord on either end, and use needle-nose or jeweler's pliers to tighten. Be careful not to tighten too much, however. You want the two sides of cord to lay flat next to each other, rather than stacking on top of each other.

Also, don't put a crimp bead too close to the prongs at the bottom. Leave a bit of space so that the anchor charm will lay flat when you wear the bracelet. If you put the crimp bead too close, it will end up right under the anchor charm instead of next to it, and won't look right.


Add your end caps, as described in the gold tube and leather bracelet post. Let the glue dry thoroughly before moving on to the next step.


Add jumps rings and a clasp to the end caps, and your bracelet is finished. You can see the blue version I made here.

This nautical-themed bracelet is great for summer, but also works well for adding a touch of the sea and ocean to your outfit year-round. Like the gold tube and leather bracelets, this anchor bracelet would make a thoughtful handmade Christmas or holiday gift!

September 26, 2013

DIY Leather and Gold Tube Bracelets Tutorial


These leather and gold tube bracelets seem to be everywhere lately. The good news is that you can make your own custom version very easily, in exactly the colors you want! You can also make more for friends and family members - they'd make great handmade Christmas or holiday gifts.


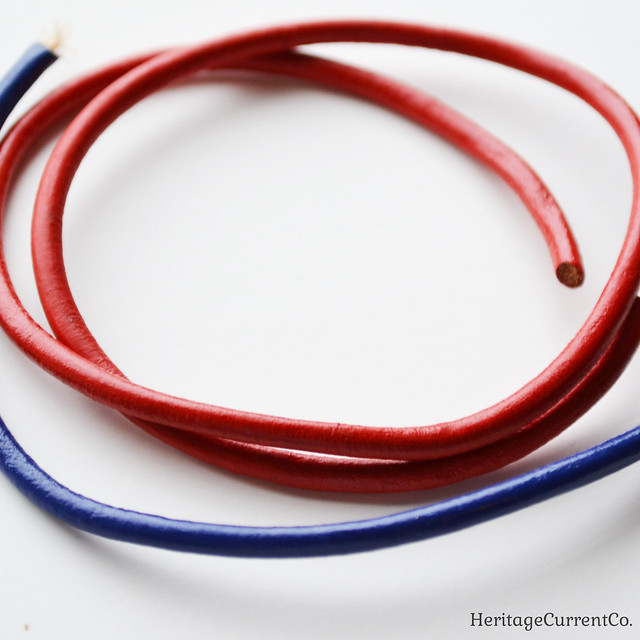
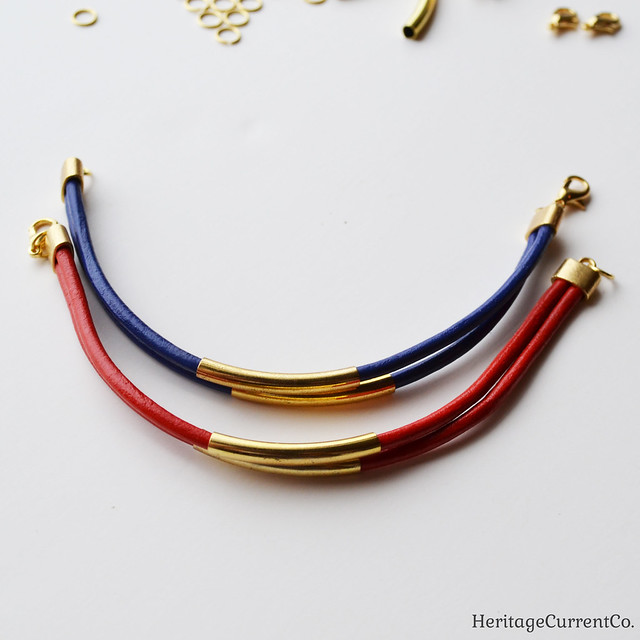
First, decide which color cord you'd like. I went with bright red, since I like how it contrasts with gold. You could also use silver or brass findings, if you'd prefer a different metal.

I used 3mm round cord, so it wouldn't be too thick or too thin. You need round cord to go with the tube beads - they just won't sit right on flat cord.


I threw in some blue cord as well, just for contrast. This one is a very bright, indigo blue.


Other than gold tube beads (not shown), you'll need a few other types of findings. For the record, since my cord was 3mm, I used 4mm tube beads. 3mm would be too tight, but 5mm would be too big. Try to go only 1mm over your cord width.

You'll need to choose a clasp. I went with these gold lobster ones. They make it much easier to put on bracelets yourself than other types of clasps.


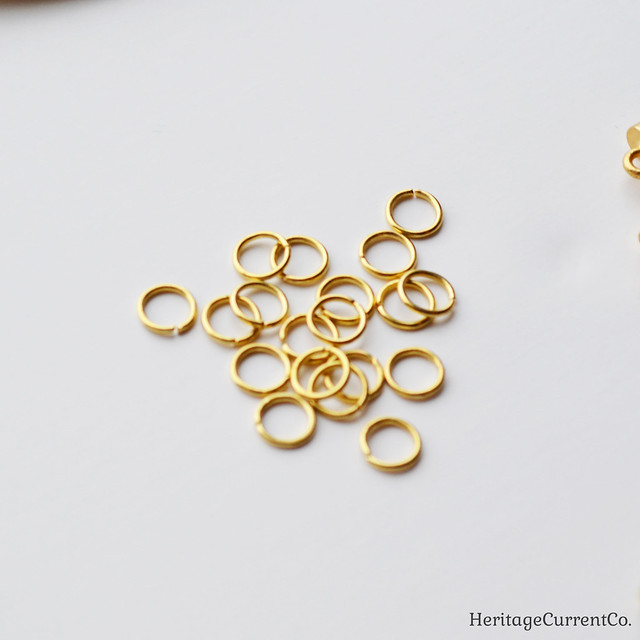
You'll need some jump rings as well. I went with ones that are 4.5mm across inside (6mm total). You could use a slightly smaller one if you'd like, but I wouldn't go any larger.


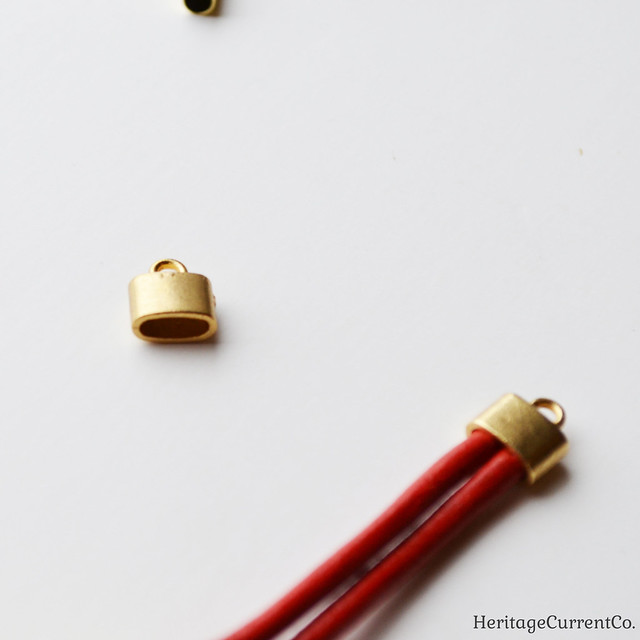
You'll need end caps for your cord. I went with these flat ones, so I could fit two lengths of cord inside. This gives your bracelets a "stacked" look, while halving the number of clasps you have to open and close! You could use single ones, or larger ones (say, for 3 or 4 lengths of cord). These ones are 7mm x 3mm.


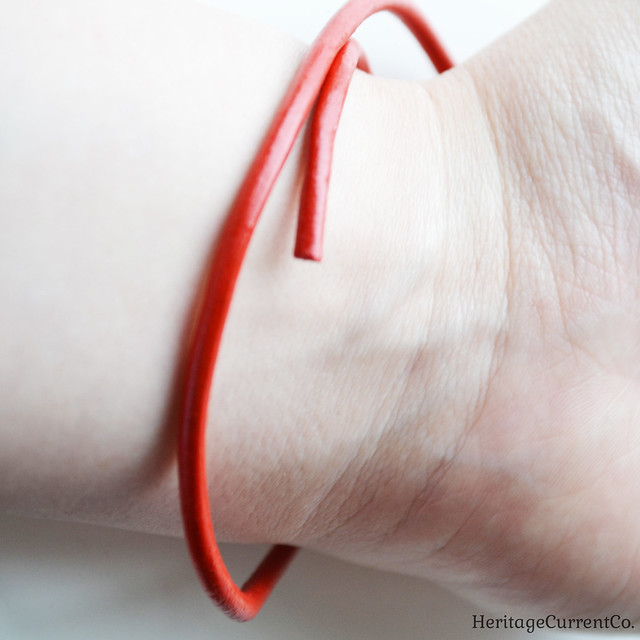
I measured my cord by wrapping it around my wrist and then cutting. Remember that adding end caps, jump rings, and clasps will add a bit of length to your bracelet. So if you don't want them to be too loose and bangle-y, go with a slightly shorter length. Make sure your lengths are the same if you'll be using the double end caps (or larger). Otherwise, they'll bunch up in strange ways instead of sitting neatly on top of each other.


Slide a gold tube bead onto each length of cord. With one length of cord, I tried adding a dab of glue in the middle of cord and then stringing the bead over it to keep it from moving around. Let's just say that the glue got pushed around and went everywhere *but* inside the tube! I found I didn't need it with the other lengths - the tube beads are tight enough on the cord not to slide around much (if at all).


Attach your end caps. I used a dab of jewelry-appropriate glue on the inside of the cap, just to make sure the cords don't slip out. The cords will fit very tightly into the cap, but I just wanted a little extra security.

I chose to use the same colors of cord in each, but you could do multiple colors. Play around and see what you like the best!


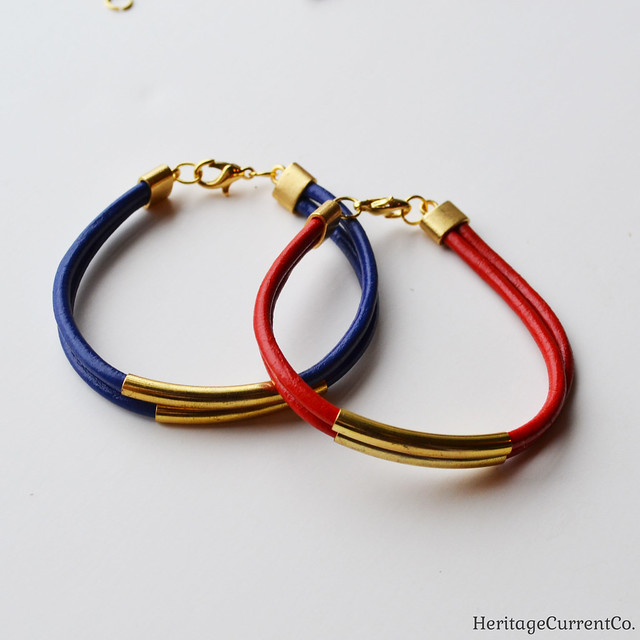
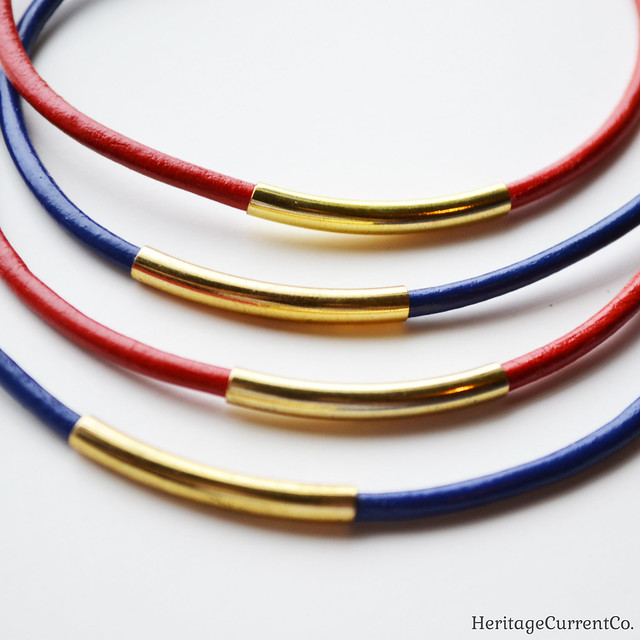
When the glue has dried completely (follow the directions on the bottle/jar), add a jump ring to one end and a jump ring & clasp to the other. Here's what your finished bracelets will look like unclasped!


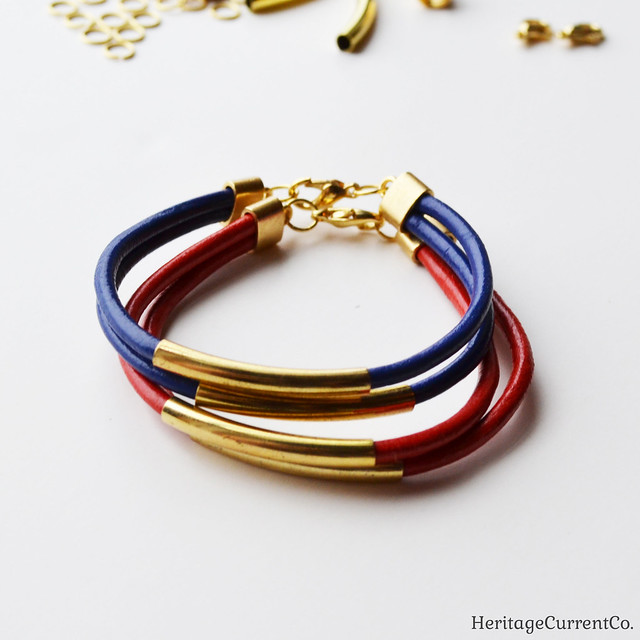
Here are the finished bracelets, stacked on top of each other like they would be on a wrist. Make as many or as few as you like - it's very easy to customize these in every way.

In my next post, I'll have a bonus project to use up your extra lengths of cord!


You Might Also Like:

Related Posts Plugin for WordPress, Blogger...