Showing posts with label flowers. Show all posts

March 28, 2016

My DIY Version of Purl Soho's Heirloom Wool Easter Eggs


Did you guys see Purl Soho's Heirloom Wool Easter eggs pattern? I thought they were nice, but I wanted a thinner version with more colorful flowers. So I decided to wing it and DIY my own.


I started by making a template out of paper. (Save this image, print out at whatever size you like, and use as a template for yours if you like it.)


I then cut twice the number of egg shapes as eggs I wanted to make out of plain white felt. You can use the good wool stuff, but I honestly prefer the polyester - it won't get eaten by moths or carpet beetles over time.

Then cut another template out of paper, but take about 3 - 4 mm off all around. Use this template to cut smaller egg shapes out of thin quilt batting, one per egg.

Then you can either hand-stitch these using blanket stitch, or use a sewing machine to sandwich the batting in between two egg felt shapes and stitch all the way around. If you look closely, I tried out a few different stitches for mine - a small zigzag, a wider zigzag, and some plain stitching. Make sure you catch the back piece of felt as you sew. You can use a walking foot if you have one, but I did these without it - I just went slowly.

Don't worry about it being perfect though! I had some spots where the back piece of felt stuck out from behind the top piece. Instead of redoing it, I either trimmed it with scissors or just put flowers over this spot.


Now for the decorating! I decided to make loops out of thin blue ribbon for hanging. I stitched them on the back side of the egg. (In retrospect, I should've sandwiched them in when I sewed the eggs, but oh well!)

Then I cut petals out of different colors of felt. Many flowers can be broken down into simple shapes. This pansy is just two bigger ovals, two medium ones, and a really big one that's almost pinched into a triangle at the top out of purple felt. Then cut two small ovals and another medium oval out of a contrasting color (here I used yellow). Then layer your petals as shown and stitch on using embroidery thread.


For this one, I drew a five-petaled flower, cut it out, and then turned it over so the pencil lines wouldn't show. If drawing isn't your thing, just do a basic five-pointed star then nip a bit more out of the petals near the center to give them a better shape. I layered a smaller flower over a larger one for the middle bloom. These were stitched on using pale pink embroidery thread and tiny stitches.


Violets are one of my favorite spring flowers! These are just two smaller ovals on top with three larger ovals on the bottom. I stitched the petals on with purple thread, then added bright yellow centers.


I got a little fancier with this one. It's just two purple cones and a larger pink oval for the pink hyacinth and purple grape hyacinths. I stitched little flower shapes in pink for the middle part, then just did lots of French knots (do a Google image search to find step-by-step tutorials!) for the side flowers.


Here you can see the other bluebells, abstract round flowers, and orange-centered daffodils one I made. Just play around with colors and your favorite blooms to customize these!

March 18, 2016

Spring's First Crocuses


My little guy and I like to go flower-watching while on our daily ramble. We'd been watching these crocuses for a few days, and finally caught them opening up one sunny morning this past week! The orange centers are so bright they almost look fake, and how beautiful are those subtle purple stripes inside? I'm definitely partial to the purple variety.


The way they're spread out and not very numerous makes me wonder how these came to be here. Did someone plant a lone bulb or two, or were they volunteers from the wind or animals? Either way, I'm glad we came across them.

I'm hoping to get out my sewing machine this weekend, in which case I'll have a DIY tutorial for you early next week - in time for Easter (hint, hint)!

August 4, 2015

Farmers' Market Flowers


It was rainy and gloomy most of this afternoon, with passing crashing-cymbal-filled thunderstorms that pelted the ground with gumball-sized hailstones. It's been years since I've seen hail! Such a strange sight, and so weird to hear thousands of little dings and whacks at once as they bounce off of different surfaces and ricochet around.

So here's a photo of bright and sunny bouquets of zinnias, veronica, amaranth, black-eyed susans, and kale from the local farmers' markets to harken back to sunnier, hail-free days!

By the way, what do you go with - farmer's market, farmers market, or farmers' market? I go with the latter because there's always more than one farmer present, but I honestly have no idea which is right.

What do you think?


May 6, 2015

Magnolia Days


Just a little snap of the "Queen of May" - the magnolia! Blushing rosy pink fading to creamy white in giant petals that slowly unfurl to their true glory and beauty. A favorite.

April 13, 2015

The Greenness of a New Spring


“That is one good thing about this world...there are always sure to be more springs.” 
― L.M. Montgomery, Anne of Avonlea


March 21, 2014

Spring Has Sprung...Sort Of...


Well, it's officially spring! The first crocuses blooming last weekend gave hints that it was on its way. I do remain a bit skeptical, however, as we're supposed to get more cold weather and snow this upcoming week. Let's hope that forecast changes stat!

Apologies for my lack of posting, but my little guy is keeping me quite busy...and very sleepy. I haven't been crafting much, but I'll post what I've been up to when I can. I hope you won't mind that it might be "quick and dirty" (ie less-than-stellar phone pics and basic directions) rather than detailed tutorials until my son is sleeping longer stretches at night.

(The above watercolor is from Created by Storm, and is absolutely lovely!)


July 1, 2013

Paper Collage Flower and Fruit Prints by Deborah Alysoun Art


I stumbled across these paper collage prints of flowers and fruits by Deborah Alysoun Art the other day, and immediately fell in love with them. I love the bright colors, subtle changes in tones and hues, and textures in these prints. 

This first one features a juicy ripe peach still on the branch. The fuzzy skin goes from yellow to orange to pink. It looks like the real thing!


She also has a cherry version. They're one of my favorite summer fruits. I think everyone has a childhood memory of staining their fingers (and their shirts) with juicy cherries on a hot July day.


This bluebell print really captures the flower's delicate petals and color variations. We always had these growing wild in the garden, and you'd see blue and purple versions on the same stalk. They looked like they'd been painted with watercolors, just like in this print!


Trilliums are little-known flowers that seem to be very popular in the flower catalogs this year. They'll grow in full shade, and they go from snowy white when they first bloom to pink tones like you see here once they've been flowering for awhile. I always love watching for the color change in them in my mother's garden.


Pansies are definitely one of the most popular spring flowers. You see these in almost every front yard, in all colors and sizes. Deborah really captured the little details of their "faces" and "beards" with her careful little cuts.


June 14, 2013

DIY Sugared Violets for Cake, Cookie, and Cupcake Decorating


I haven't done a DIY/tutorial in ages, so I finally have one again for you today! (I'll be adding some jewelry ones over the next month as well.) Today's DIY will show you how to make your own sugared violets for decorating cupcakes, cakes, and cookies. Who needs fancy and expensive fondant flowers when you can just sugar edible flowers yourself?


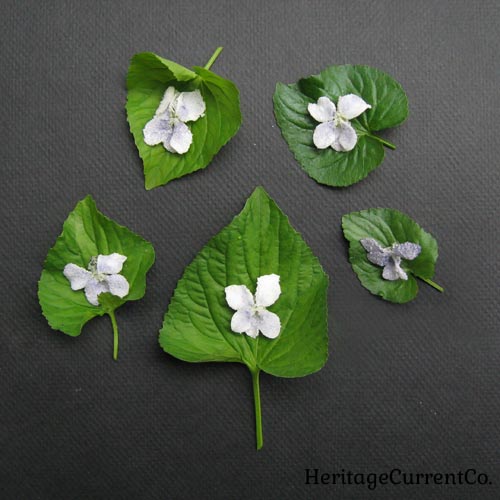
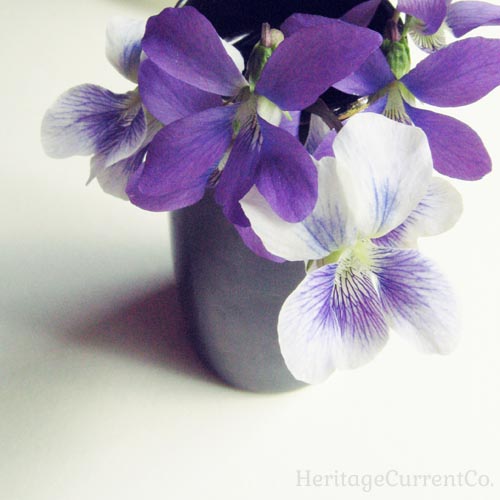
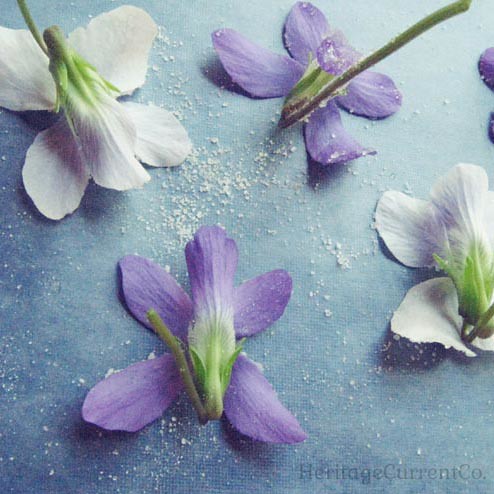
I used a mix of purple violets and white violets. I think the white ones are my favorites - I love the purple veins in the middle! Double-check/Google that you have the right variety and species before you pick your own and make sure they haven't been sprayed with pesticides or animal urine/waste! If you can't find any in your area that are safe to pick, try ordering them from a local florist. Sidenote: roses, pansies, and nasturtiums are also edible! (But, again, double-check that you have the right kinds, parts, and are not pregnant.) 101 Cookbooks recently posted a great and much more extensive piece on edible flowers, you can read it here!

Carefully wash your flowers and let them air dry. You could wash them the day before and then sugar them the next. The sugaring part takes less than an hour to do, not counting drying time after.


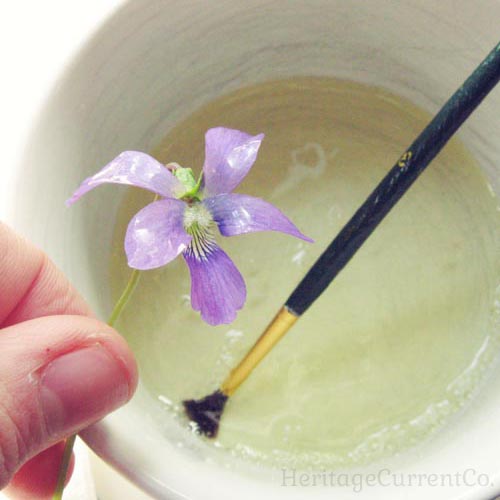
Crack an egg into a bowl or cup, separate out the white, and lightly beat it with a little bit of water. I don't have an approximate amount, I think I added roughly "a splash". First, I tried just dunking the violets. This was a mess. The petals bent back on each other and stuck to each other. So I tried a new method. Take your violet, and flatten one petal against a sheet of wax paper as if you were getting the bloom ready for a flower press (don't unattach it from the rest of the flower). Then take a soft brush, dab off the excess against the rim of the bowl/cup, and "paint" the petal as if you were painting a fingernail. You only need a fairly thin coat, so don't put it on too thickly. Do the next petal, until you've done all five. Don't do the backs just yet, just the face of the violet! Because of the egg white involved, don't eat these if you have a compromised immune system in any way (are young, old, sick, etc.).


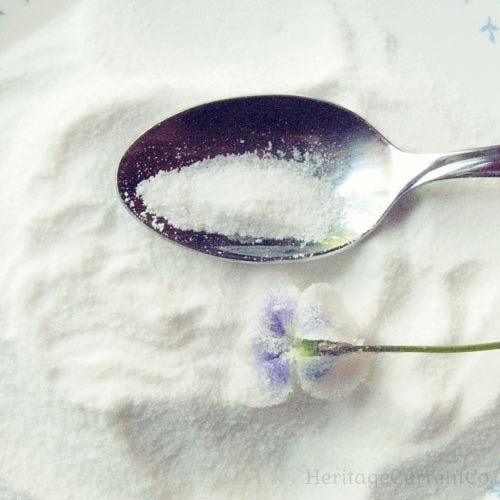
Spread sugar on a plate or in a bowl. I used maybe a cup, but had plenty leftover. I used regular sugar, but superfine sugar would work even better! Use a spoon or your fingers to gently sprinkle an even layer of sugar onto the violet. Don't layer on too much, you don't want the petals to bend too much or break off under the weight of too much sugar. Sugar all five petals, then lift up your flower and let the excess fall back onto the plate/bowl. You can give it a very gentle shake to help this happen.


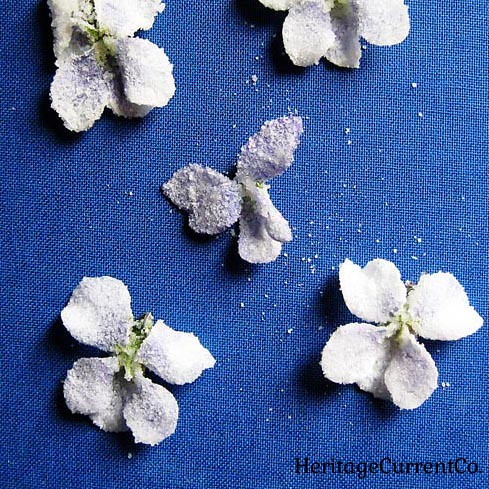
Lay your sugar-faced violets face down on a sheet of waxed paper. Then brush the backs with the egg white mixture, and sugar the backs in the same way. Transfer to a clean sheet of waxed paper to dry. I dried mine face down, but you could do the opposite if you prefer. Depending on humidity levels, it may take them as little as a day or as much as several days. The sugar takes on more of a white, almost rock candy-esque look when they've dried and they will feel crusty to the touch. Let them dry for at least a day before checking, though, so you don't wipe off sugar by accident if you touch them to check. Whichever way you lay them down on the paper, turn them over at least once to the opposite face during this time to help both sides dry evenly.


You might be thinking you could just sugar one side, since the back won't show. I tried this the first time I did these, and it just didn't end well. Because the fronts of the petals were so much heavier than the backs, when I picked them up to move them, petals broke off. They were just too delicate with only one side done. So do both! After they've dried, transfer them to a waxed paper lined airtight container and keep them at room temp. They'll last for about a week.


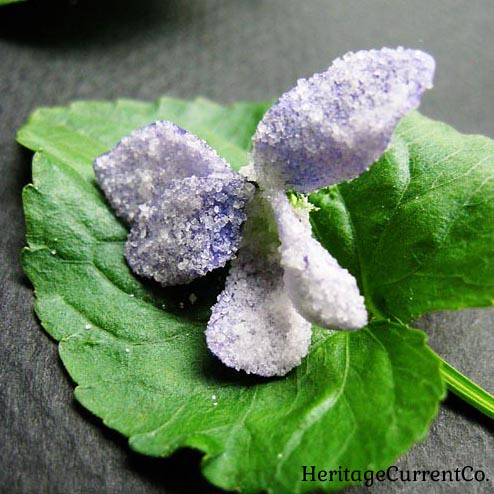
Here's a close-up of one of the purple violets, laying on a violet leaf.


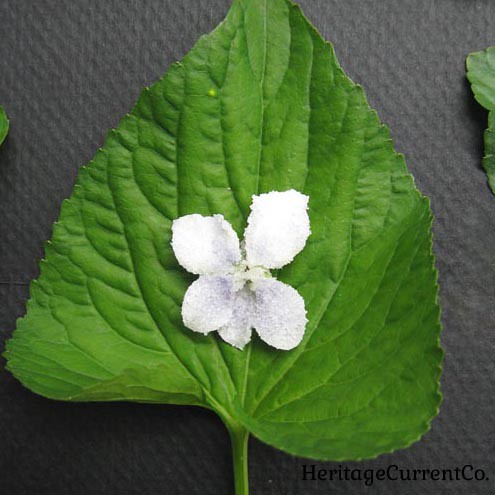
Here's the white violet version. Though they're edible (and again, make sure you have the right kind, that they haven't been sprayed, and that you don't have a compromised immune system because of the raw egg white, etc.), I think they're too pretty to eat! The sugar turns the bright purple to a pastel lavender, and it makes them sparkle. They'd look lovely perched on top of a cupcake, frosted sugar cookie, or ringing the base or top of a cake. They'd look lovely ringed around the bottom of each tier of wedding cake at a reception as well, with more arranged in the center of the top tier. If you had enough violets, you could completely cover the sides of a cake with them. Wouldn't that be stunning?

May 3, 2012

1915 New York City Flower Show on Flickr


These photos of women with flower baskets are perfect for bringing a little sunshine to a rainy spring day! They look so suited for the season with their wide-brimmed hats trimmed with ribbon, their light and long cotton dresses, and their baskets filled with flowers they've collected.


I wonder about the story behind these shots. Are the flowers grown by the women themselves, ready to be judged at the show, or are the women the judges collecting their favorites from the stalls? Maybe they're selling the flowers as souvenirs to visitors.

At any rate, these photos might finally get me to spring for a straw hat with ribbons dangling down the back for pairing with colorful, vintage-inspired spring dresses and days at the beach.

Click on the photos to view them larger on Flickr!

March 21, 2012

New Prints in the Store!


I've added lots of new prints to the shop - 3LambsIllustration (formerly 3LambsGraphics) - over the past couple of months. Here are 4 of my favorites: "Wanderlust" - inspired by the constant case of wanderlust I have and antique maps, "Paris is Always a Good Idea" - a lovely Audrey Hepburn quote that pairs perfectly with my "I Believe in Pink" and "The Best Thing to Hold Onto" prints, "Little Girl with a Wild Bird" - a print inspired by the charming personalities of little girls and the awe of nature, and "She Wasn't Boring" - a sassy Zelda Fitzgerald quote.

If you're not familiar with the latter, she was married to F. Scott Fitzgerald and was full of what they call "gumption"! She was also a good writer herself. I highly recommend her novel "Save Me the Waltz"!

See more prints from my store here.

October 6, 2011

Real Dried Flower and Plant Prints by Flat Flower Cards


These real dried flower and plant prints by Flat Flower Cards are a great way to preserve the bright colors of late summer's flora and fauna and bring their freshness indoors year-round.

From top to bottom, the prints display green wood ferns, multi-toned Chinese tallow leaves, and exotic purple passionflower blossoms and vines.

See more in their Etsy shop here!

August 31, 2011

Vivid Flower and Vegetable Paintings by Elisabeth Kruger


Elisabeth Kruger's flower and vegetable paintings are so life-like that it's hard to believe they're not photographs, isn't it? The petals and leaves have so much detail that they just pop off the canvas.

See more of her amazingly detailed paintings here!


August 26, 2011

Wildflower Paintings by Cool Ranch Studio


Caroline Saganich uses such vivid colors in her "Wildflower" series paintings, on reclaimed cedar wood. She accents rich green and blue tones with splashes of metallic gold paint, as well as engraved and drilled details. I can see grouping two or three of these little masterpieces on a wall together, or on a mantel.

See more of her whimsical pieces here.

August 5, 2011

Farmers Markets


What's that saying - "everything hits at once"? I've certainly been feeling that this past month. So I've been retreating. And I've been very quiet. I don't talk much when I'm processing a lot of bad news at once.

I've been getting back to the simple things. The cardinal that sings all morning in the backyard as he sits in the forsythia. The little wasp that cleans himself as he hides from the hot midday sun under the parsley. The bumblebee that happily buzzes among the tomato flowers.

Another favorite respite is the local farmer's market. Early August is a wonderful month for the harvest. My favorite yellow Shiro plums arrive, and crisp, juicy Sugar Baby watermelons appear. Zinnias are everywhere - I can never get enough of their papery, sometimes even velvety petals.

How do you recharge?

June 15, 2011

Peony "Ice Cream" Cone Vase Tutorial, Part II


While looking through wedding ceremony flower photos, I had an epiphany. The same ribbon-wrapped technique used to attach paper cones of flowers to chairs could be used to display ice cream cone vases full of peonies as diy'ed in this tutorial.


Choose ribbon in whatever width and color you like. (Although I wouldn't go wider than 4 - 5 mm, or you'll have trouble getting it to lay flat against the cone.)

Wrap it around the bottom, crossing it once behind and once more again in front. Then wrap it up towards the top so the two ends hit right across from each other. This will keep the cone balanced once it's filled with flowers. Add small pieces of tape to hold it in place.


Get your glue ready. You can use hot glue (be careful!), Elmer's, Tacky - whatever you like. Peel back the ribbon and put glue on the underside. Put the ribbon back where it was and press down so it stays.

For the areas where you can't unwrap it (like the crossed areas), simply put some glue over the spot and rub it into the ribbon. This will help it soak through and attach the fabric to the cone.


Let dry, then fill with a lovely peony! Hang from the back of a chair, a bench, or cabinet knob to display.

Peony cones also look great on doors and stair posts!

June 3, 2011

Kate's Wedding Bouquet


Inspired by loveliness of the Royal Wedding as well as by the ever-graceful Catherine, Duchess of Cambridge, I sketched the individual blooms from her bouquet. Then I inked them over in black, and added color with pencils.

Clockwise from the top right, the flowers pictured are dianthus (also called Sweet William), myrtle, ivy, hyacinth, and lily-of-the-valley.

What's inspired you to sketch lately?

You Might Also Like:

Related Posts Plugin for WordPress, Blogger...