Showing posts with label cooking. Show all posts

June 14, 2013

DIY Sugared Violets for Cake, Cookie, and Cupcake Decorating


I haven't done a DIY/tutorial in ages, so I finally have one again for you today! (I'll be adding some jewelry ones over the next month as well.) Today's DIY will show you how to make your own sugared violets for decorating cupcakes, cakes, and cookies. Who needs fancy and expensive fondant flowers when you can just sugar edible flowers yourself?


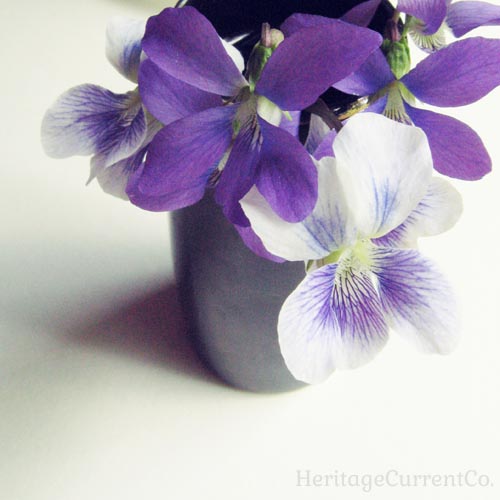
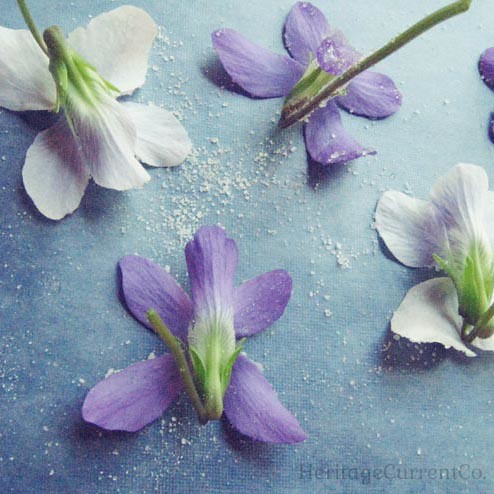
I used a mix of purple violets and white violets. I think the white ones are my favorites - I love the purple veins in the middle! Double-check/Google that you have the right variety and species before you pick your own and make sure they haven't been sprayed with pesticides or animal urine/waste! If you can't find any in your area that are safe to pick, try ordering them from a local florist. Sidenote: roses, pansies, and nasturtiums are also edible! (But, again, double-check that you have the right kinds, parts, and are not pregnant.) 101 Cookbooks recently posted a great and much more extensive piece on edible flowers, you can read it here!

Carefully wash your flowers and let them air dry. You could wash them the day before and then sugar them the next. The sugaring part takes less than an hour to do, not counting drying time after.


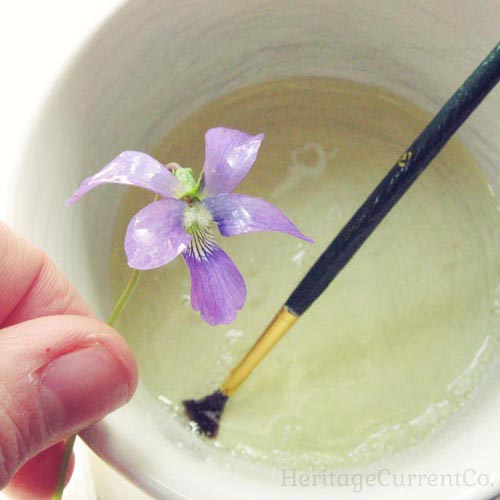
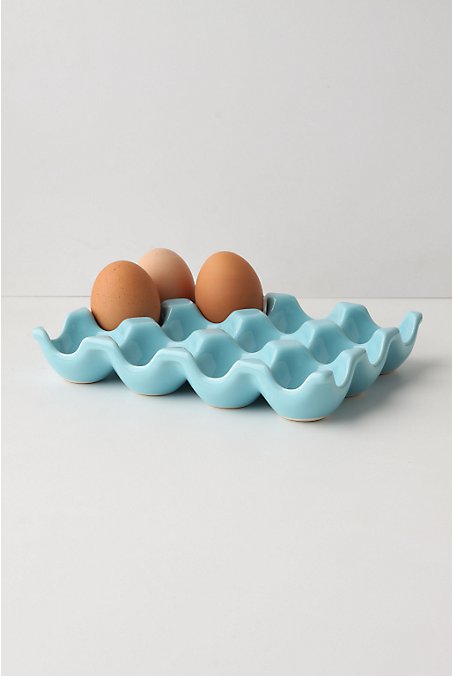
Crack an egg into a bowl or cup, separate out the white, and lightly beat it with a little bit of water. I don't have an approximate amount, I think I added roughly "a splash". First, I tried just dunking the violets. This was a mess. The petals bent back on each other and stuck to each other. So I tried a new method. Take your violet, and flatten one petal against a sheet of wax paper as if you were getting the bloom ready for a flower press (don't unattach it from the rest of the flower). Then take a soft brush, dab off the excess against the rim of the bowl/cup, and "paint" the petal as if you were painting a fingernail. You only need a fairly thin coat, so don't put it on too thickly. Do the next petal, until you've done all five. Don't do the backs just yet, just the face of the violet! Because of the egg white involved, don't eat these if you have a compromised immune system in any way (are young, old, sick, etc.).


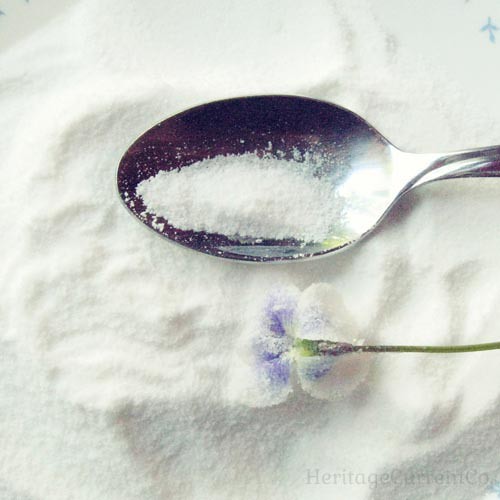
Spread sugar on a plate or in a bowl. I used maybe a cup, but had plenty leftover. I used regular sugar, but superfine sugar would work even better! Use a spoon or your fingers to gently sprinkle an even layer of sugar onto the violet. Don't layer on too much, you don't want the petals to bend too much or break off under the weight of too much sugar. Sugar all five petals, then lift up your flower and let the excess fall back onto the plate/bowl. You can give it a very gentle shake to help this happen.


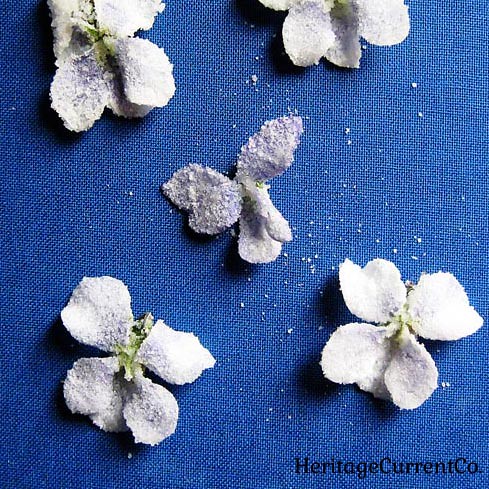
Lay your sugar-faced violets face down on a sheet of waxed paper. Then brush the backs with the egg white mixture, and sugar the backs in the same way. Transfer to a clean sheet of waxed paper to dry. I dried mine face down, but you could do the opposite if you prefer. Depending on humidity levels, it may take them as little as a day or as much as several days. The sugar takes on more of a white, almost rock candy-esque look when they've dried and they will feel crusty to the touch. Let them dry for at least a day before checking, though, so you don't wipe off sugar by accident if you touch them to check. Whichever way you lay them down on the paper, turn them over at least once to the opposite face during this time to help both sides dry evenly.


You might be thinking you could just sugar one side, since the back won't show. I tried this the first time I did these, and it just didn't end well. Because the fronts of the petals were so much heavier than the backs, when I picked them up to move them, petals broke off. They were just too delicate with only one side done. So do both! After they've dried, transfer them to a waxed paper lined airtight container and keep them at room temp. They'll last for about a week.


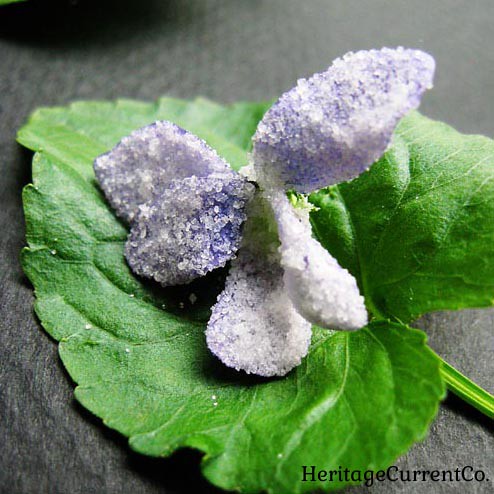
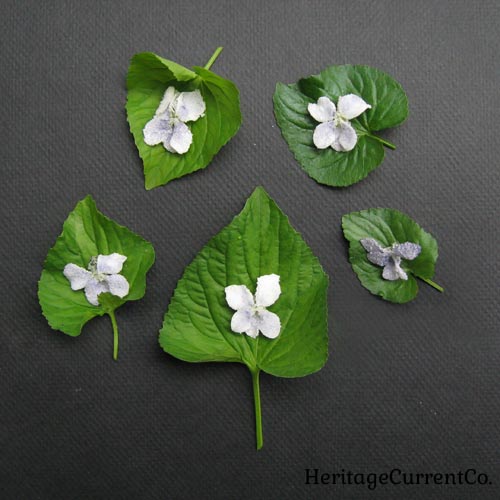
Here's a close-up of one of the purple violets, laying on a violet leaf.


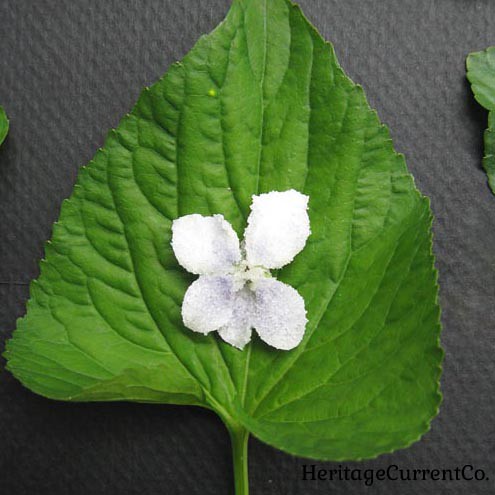
Here's the white violet version. Though they're edible (and again, make sure you have the right kind, that they haven't been sprayed, and that you don't have a compromised immune system because of the raw egg white, etc.), I think they're too pretty to eat! The sugar turns the bright purple to a pastel lavender, and it makes them sparkle. They'd look lovely perched on top of a cupcake, frosted sugar cookie, or ringing the base or top of a cake. They'd look lovely ringed around the bottom of each tier of wedding cake at a reception as well, with more arranged in the center of the top tier. If you had enough violets, you could completely cover the sides of a cake with them. Wouldn't that be stunning?

March 7, 2013

Free Jams, Jellies, Vanilla Extract, Etc. Labels


It's marmalade season around here! Bitter oranges - also called Seville oranges - have a very short season. So when we saw them in our local Whole Foods, we just had to buy some. This weekend we'll be slicing them up and making Darina Allen's recipe for marmalade. And in less than a month, it should be strawberry jam season as well! So, in the spirit of fellow preserve-makers and canners, I decided to take the time to alter and clean up two vintage labels so that they can be used to label your homemade jams, jellies, syrups, liqueurs, etc. I made them red and white because it reminds me of vintage gingham and vintage kitchens. Just right click and hit "save as", then print to whatever size you like! Attach with rubber cement, a gluestick, or glue or print them on sticker or label paper and then just peel off the back.

The first one shown above is perfect for homemade vanilla extract. It may sound complicated, but it's actually incredibly simple to make! Just pick a jar you like, add 5 - 6 vanilla bean pods scored down the middle but with the seeds intact, and then cover with vodka or rum. Let steep for at least three months, shaking at least once a week. Keep adding liquor as you use it up, and replace one pod every six months or so with a fresh one and you'll have homemade extract for years! So much more flavor than the store-bought stuff, and much less expensive. I know vanilla pods can be pricey in the store, but if you look for bulk amounts of them online, they are insanely cheap (as in less than a dollar per pod)!


This one is perfect for jams, jellies, marmalades, liqueurs or even your own homemade loose tea or spice mixes! You could use them for baked goods or handmade candies as well. Just write what it is on the line, then sign your name under 'Prepared By". It has enough space to add "with love", "in honor of your birthday", "Happy Easter!", or other little notes below the name. So many possibilities!

Please note that these are for personal use only. Please do not alter them and sell them, or sell them as is. If you link to them, please credit me. Thanks!

September 14, 2011

Pop Chart Lab Prints


Pop Chart Lab out of Brooklyn, NY is known for their playful, pop culture, chart-based pieces. They catalog and organize whatever catches their fancy, from haircuts to varieties of beer to culinary tools (and many more - including rap names!).

Check out more of their whimsical prints and tees here!

April 1, 2011

Bright Pink Rhubarb


I contemplated opening this with a "crickets" reference, but instead I'll just apologize right off the bat for the lack of posting. An unfortunate early-spring cold has me reeling, and I've spent too many hours in bed or on the couch.

About all I've been able to muster in the kitchen is this delightfully bright pink rhubarb conserve. It's as simple as it gets, and a lovely harbinger of spring. Just dice rhubarb stalks, put in a pot with the juice of half a lemon and sugar to taste (start with 1/4 c.), and simmer until the rhubarb breaks down into little strings.

Let it cool, and then try not to stand over it with a spoon, devouring the entire batch of sweet-yet-still-tart, lemon-tinged deliciousness. If you manage to do this, it's wonderful spread on toast the next day or stirred into vanilla yogurt or ice cream.

October 29, 2010

Roasted Sugar Pumpkin and Apple Soup


I made this soup earlier this week with sugar pumpkins from a farmers' market. The recipe is simple and can be easily tailored to your own flavor preferences!

2 small sugar pumpkins (about 2 lbs. each), stems removed, cut in half, and pulp removed
1 Tbsp. olive oil

2 Tbsp. olive oil
1/2 medium yellow onion, diced
1/2 clove of fresh garlic
1 medium apple (I used a Macoun, you could use a Granny Smith if you want more of a tart flavor), cored and diced
6 c. low-sodium chicken stock
few dashes of nutmeg
few dashes of ginger
salt and pepper to taste
plain yogurt or sour cream (optional)

1. Preheat the oven to 450 degrees.

2. Toss the pumpkin halves with the olive oil and place the pumpkin halves in a pan (you may need two, depending on their size). I like to place them cut side down. Roast until they can be easily pierced with a knife (about 45 mins). Remove them from the oven, turn the oven off, and let them cool.

2. While the pumpkins are cooling, heat the 2 Tbsp. oil in a large pot. Add the onions, and saute them until they are translucent.

3. While the onions are cooking, if the pumpkins are cool enough, remove their skins and dice them.

4. Add the diced pumpkin, garlic, and apple to the pot. Add in the spices. You may use cinnamon in addition to (or instead of) the nutmeg and ginger if you would like. Allspice, mace, cloves, or curry powder would also be great additions!

5. Pour in the chicken stock, and bring the mixture to a boil.

6. Once it's boiling, turn down the heat. Let the soup simmer for 45 mins. to an hour to let the flavors meld together.

7. Remove the pan from the heat, and use an immersion blender to turn the chunky mixture into a lovely, velvety one! Your pot should be less than halfway full, so that you don't splash yourself with the very hot soup. If your pot is not big enough, pour the soup into a larger vessel. If you don't have an immersion blender, you can use a masher instead. You can also use a blender, but you will have to do it in batches. Do not fill your blender more than halfway! Hot liquids will expand too much, and the top will fly off. You don't want to get burned!

8. Put the blended soup back on the stove, and bring it back up to temperature. Add salt and pepper to taste.

9. Ladle into bowls. For a fancier presentation, swirl in a dollop of plain yogurt or sour cream. Serve and enjoy!

February 24, 2010

A Lovely Morning


A few of my new favorite kitchen wares! Picture yourself in a cozy kitchen lit up by the morning sun, sipping rose-colored orange juice from these Victorian cups as you lean over the stove. You select a few eggs from their lovely ceramic nest, and gently crack them into a skillet. Once they're perfectly sunny side up, you sit down at your farmhouse table with a dainty mug of espresso, warm and soothing against the winter's chill.

Doesn't it sound like a great way to start the morning?

(Click on the photos to learn more about each item.)

March 3, 2009

Winter Warmers

Although art and design are my first loves, I can spend hours futzing around in the kitchen. It's a great de-stresser for me, a peaceful escape from projects and plans.

In the winter, I cook a lot of soups and stews. Unfortunately, I don't have a lot of casserole experience (other than the tuna noodle kind). Since spring is just around the corner - well, hopefully! - I plan on making as many stews and slow-cooked dishes as I can in the next few weeks.

This Indian Spiced Casserole from Real Simple is full of chicken, ginger, cinnamon, raisins, and almonds under a phyllo dough topping. It's definitely on my "to bake" list!

You Might Also Like:

Related Posts Plugin for WordPress, Blogger...