Showing posts with label jewelry. Show all posts

August 28, 2014

DIY Nautical Anchor Necklace and Earring Set Tutorial


Just in time for summer's end (sorry guys, but these would make great Christmas presents!), I have a DIY Nautical Anchor Necklace and Earring Set tutorial. It's really easy, and can be customized to whatever length and spacing you like.

I purchased silver anchor charms on Etsy that were a good size (about an inch or less), and I made sure they had a hole at the top for a jump ring and another hole somewhere on the bottom for another jump ring. You could definitely purchase ones with only a top hole, however, and just have them dangle off instead of being connected on both sides with chain. As you'll see close-up later, I did this with the bottom-most anchors of each chain, to make them pendants.

I had silver chain from another project sitting around, so I used it for these pieces as well. The chain I used has small links and is pretty delicate, but if you want something bolder, go for it!


I like long necklaces, so I made my outermost one about 33 inches, and the inner necklace about 27.5 inches.

I used pieces of twine to choose the lengths, then laid out each piece of twine in a straight line on a flat surface to plan my necklace. I found the center point of each and marked it for the hanging anchors, and then measured 5 inch lengths on either side and marked those. I laid out my anchors and jump rings next to these markings, so that the bottom jump ring would fall at the 5" mark. This would leave 5" of chain from the bottom of the anchor to the pendant. I found this method - using rounded lengths of chain - to be easier when it came time to measure and cut the chain. Then I wouldn't have to subtract half of the anchor and jump ring length, or measure strange lengths.

Based on laying out my anchors and jump rings, I then measured 5" lengths from the top jump rings to figure out where the next anchor would go. For the outer necklace, I ended up with two anchors (4 total) on either side of the pendant, and one anchor (2 total) for the inner necklace.

I used fewer on the inner, even though I ended up having about 7.5 inches of chain on each side going up to the clasp (instead of 5") because I didn't want anchors rubbing against my collarbone area. However, you could make the inner necklace have two anchors on either side if you wanted. Use whatever spacing you like as well!

I then cut my lengths of chain, and attached them between the anchors using pliers and the jump rings.


Here's a close-up of one of the hanging anchor pendants.


Here's what the bottom parts of each chain look like. At the top part of necklace, for the clasp, I attached both the inner and outer necklace chains to one jump ring on each side and then attached these rings to the clasp. Make sure your chains don't get twisted as you do this!


Since I had leftover charms and still more chain, I made matching earrings. The longer chain length is about 1.75", and the shorter piece is about 1". Again, you can customize this part depending on your personal taste and style!

Even though I used anchors here, you could use a variety of charms (or even mix and match). Crosses, ship's captain's wheels, little bows, Celtic knots. You could change the metal color as well, especially to rose gold or a nice warm bronze for fall.

How would you customize this?

June 25, 2014

Elizabeth Street Jewelry


I stumbled across these little gems (see what I did there?...sleep deprivation = bad puns) earlier today and immediately had to go down the rabbit hole of links to find the original source. Enter Elizabeth Street Jewelry, crafted in Brooklyn. Look at how intense the tourmalines are! I love the way the various shades of pink swirl inside the large oval ring. I don't think I've ever seen anything like it before.


This grey rose-cut diamond is another favorite piece. I love the way it's connected to the ring. So clever to use loops, so that it will gently swing around and sparkle in the light. Again, I have never seen a ring like this before!

See more pieces from Elizabeth Street Jewelry here.

November 7, 2013

DIY Chandelier Crystal, Lapis, and Gold Necklace


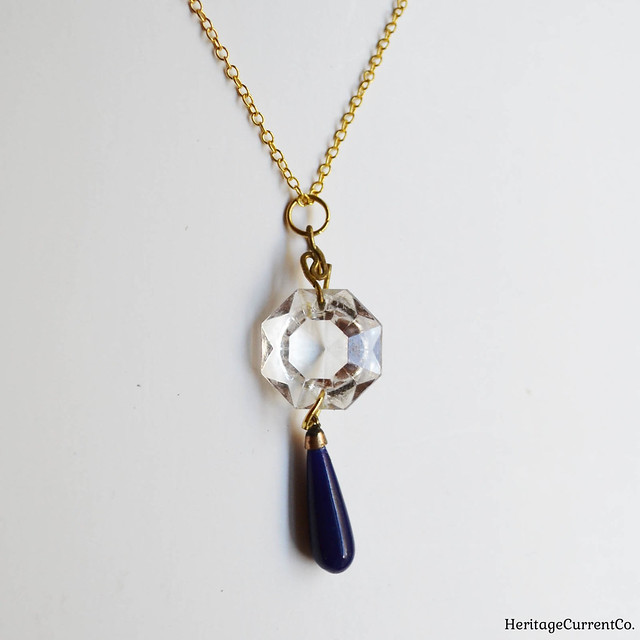
Like my DIY bead bar necklaces, this is another super-simple tutorial. Take an octagonal chandelier crystal with holes drilled on opposite sides (you can buy these online, I found mine in the "Supplies" section of Etsy) and then pick out a teardrop shaped bead. I used one that's about an inch long, and made of lapis-colored glass since I really like the combination of white, blue, and gold together. You could also go with a pearl drop, green glass drop, or even a gold one. You could use a round bead as well, but I think the teardrop shape balances out the octagonal crystal better - I think you need something longer than the crystal to give it a lavalier-type look.

My chandelier crystal still had one original hanging wire attached, so I simply slipped a large gold jump ring onto it and then closed the loop. The crystal also had a drilled hole at the bottom, so I simple slipped a large gold jump ring through it, added the lapis, then closed it. I strung this onto gold-plated chain, and instantly had an elegant, vintage-inspired necklace to wear. So easy, right? I think it looks very 1920s England/Downton Abbey-esque. What do you think?

Since you usually have to buy multiple beads at a time, the extras would be great for turning into one-of-a-kind holiday or birthday gifts for friends and family.

October 25, 2013

DIY Bead/Gem and Gold Wire Bar Necklaces


I don't know if I should actually call this post about DIY bead/gem and gold wire bar necklaces a tutorial, it's so simple that you really don't need more than a few basic instructions!

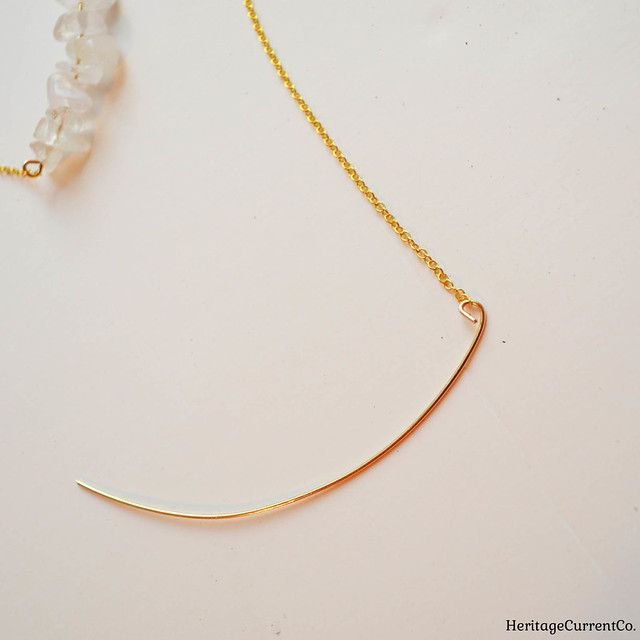
First, pick out some fairly thick gold wire. I used 40 gauge. Use something thick enough that it will hold its shape and not get bent easily with wear. Then select matching gold (either real, gold-plated, or gold tone - your choice!) chain. Make sure the links are wide enough to slip onto the wire.


Cut a length of wire with the wire-cutting part of your pliers. I usually do about three inches, leaving myself extra that I can cut off later. Take a pair of needle-nose pliers, and form a loop at one end, as shown. Slip the chain onto the loop, and tighten the loop to close it.

Then just add your beads! Make sure their openings are wide enough to fit onto the wire. In the first picture here, you can see I used some diamond shaped green glass beads and then irregular white quartz ones. Put on as many or as few beads as you wish. I made my line of beads about 2 - 2.5 inches long. Leave a bit of wire to form a loop, then cut off the extra. Form your second loop, doing the best you can to make it match the shape of your first one (you can fiddle with both loops after to make them match, or just leave as is - to be honest, people probably won't notice!). Before you tighten it, slip on the other end of your chain. Then close the loop. That's it!

I like my necklaces long, so I used about 30 inches of chain. Since this makes it easy to slip the necklaces over my head, I didn't need a clasp. If you want a shorter necklace that needs a clasp, I'd cut two lengths of chain and slip one end of each onto each loop, and then add your clasps. When you do this part, remember that one side of the clasp (the one with the hook you open) will be longer than the other. So, make that section of chain just a bit shorter so that when you line up each piece of chain with your clasp pieces, the total lengths end up being equal. Is this clear? If not, let me know and I'll add a picture!

Since these bar necklaces have sparkle and shine, they'd be make great accessories for holiday parties. They also make inexpensive, easy Christmas and holiday gifts for your friends and family!

September 26, 2013

DIY Leather and Gold Tube Bracelets Tutorial


These leather and gold tube bracelets seem to be everywhere lately. The good news is that you can make your own custom version very easily, in exactly the colors you want! You can also make more for friends and family members - they'd make great handmade Christmas or holiday gifts.


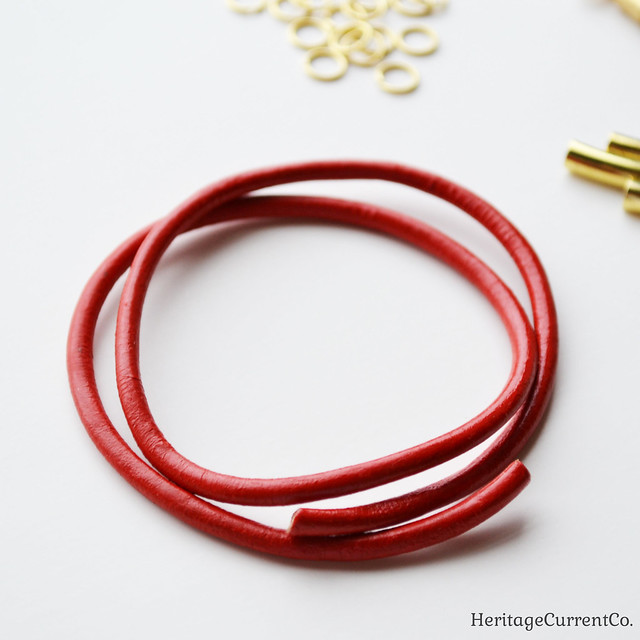
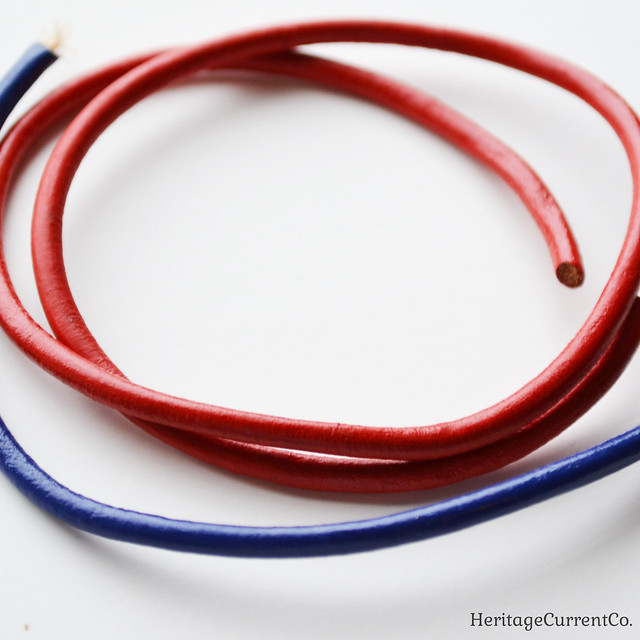
First, decide which color cord you'd like. I went with bright red, since I like how it contrasts with gold. You could also use silver or brass findings, if you'd prefer a different metal.

I used 3mm round cord, so it wouldn't be too thick or too thin. You need round cord to go with the tube beads - they just won't sit right on flat cord.


I threw in some blue cord as well, just for contrast. This one is a very bright, indigo blue.


Other than gold tube beads (not shown), you'll need a few other types of findings. For the record, since my cord was 3mm, I used 4mm tube beads. 3mm would be too tight, but 5mm would be too big. Try to go only 1mm over your cord width.

You'll need to choose a clasp. I went with these gold lobster ones. They make it much easier to put on bracelets yourself than other types of clasps.


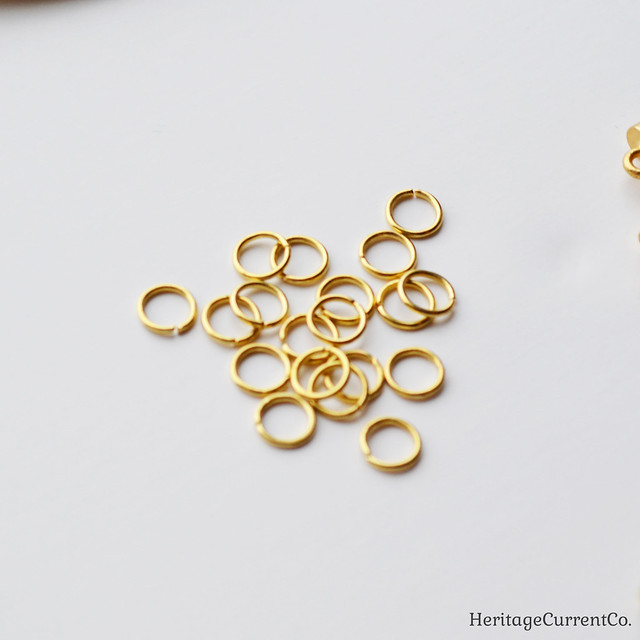
You'll need some jump rings as well. I went with ones that are 4.5mm across inside (6mm total). You could use a slightly smaller one if you'd like, but I wouldn't go any larger.


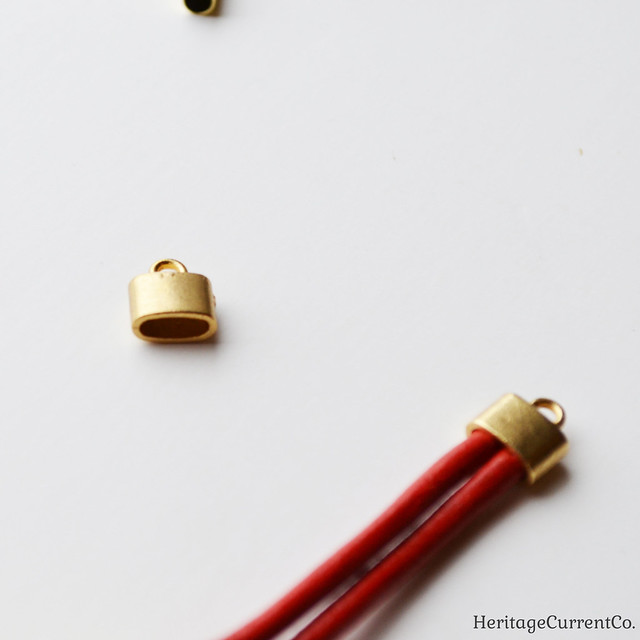
You'll need end caps for your cord. I went with these flat ones, so I could fit two lengths of cord inside. This gives your bracelets a "stacked" look, while halving the number of clasps you have to open and close! You could use single ones, or larger ones (say, for 3 or 4 lengths of cord). These ones are 7mm x 3mm.


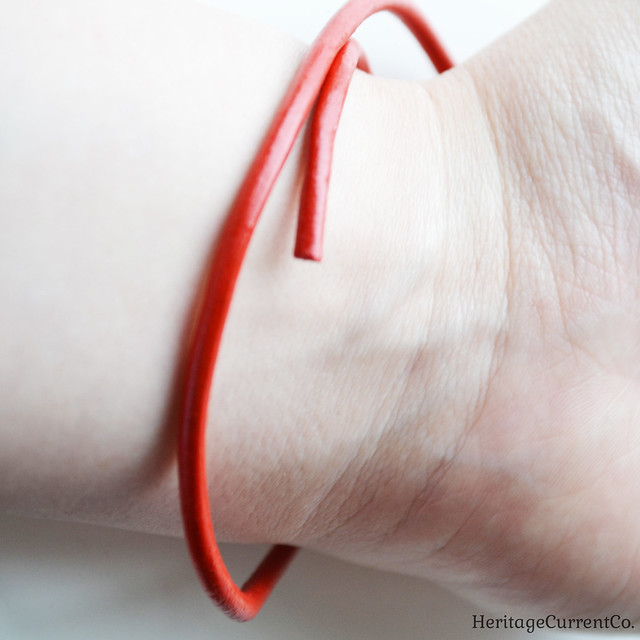
I measured my cord by wrapping it around my wrist and then cutting. Remember that adding end caps, jump rings, and clasps will add a bit of length to your bracelet. So if you don't want them to be too loose and bangle-y, go with a slightly shorter length. Make sure your lengths are the same if you'll be using the double end caps (or larger). Otherwise, they'll bunch up in strange ways instead of sitting neatly on top of each other.


Slide a gold tube bead onto each length of cord. With one length of cord, I tried adding a dab of glue in the middle of cord and then stringing the bead over it to keep it from moving around. Let's just say that the glue got pushed around and went everywhere *but* inside the tube! I found I didn't need it with the other lengths - the tube beads are tight enough on the cord not to slide around much (if at all).


Attach your end caps. I used a dab of jewelry-appropriate glue on the inside of the cap, just to make sure the cords don't slip out. The cords will fit very tightly into the cap, but I just wanted a little extra security.

I chose to use the same colors of cord in each, but you could do multiple colors. Play around and see what you like the best!


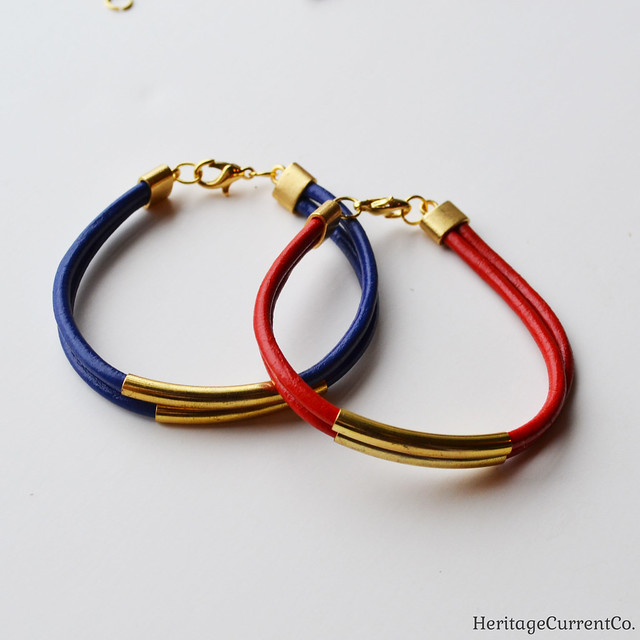
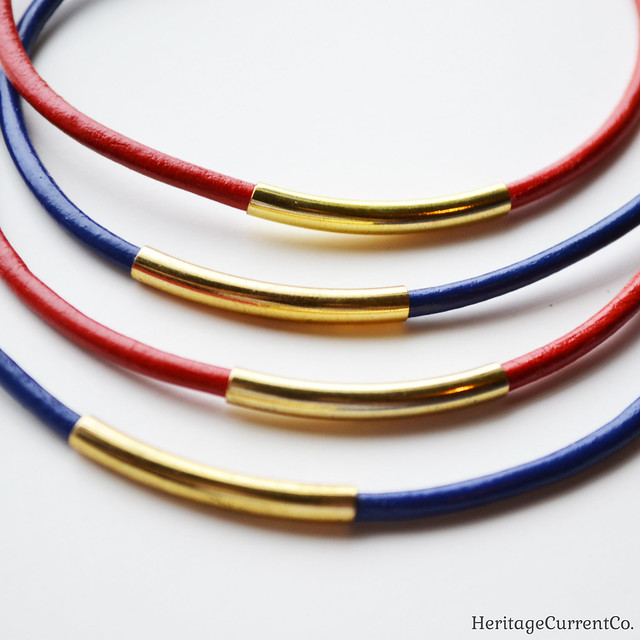
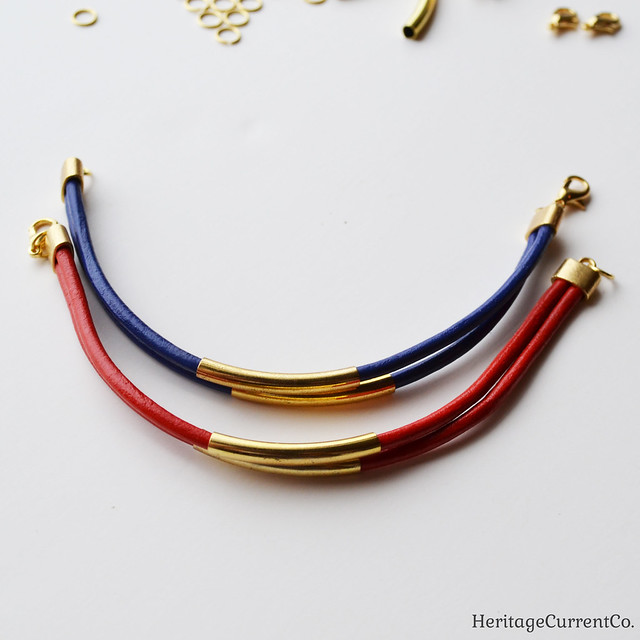
When the glue has dried completely (follow the directions on the bottle/jar), add a jump ring to one end and a jump ring & clasp to the other. Here's what your finished bracelets will look like unclasped!


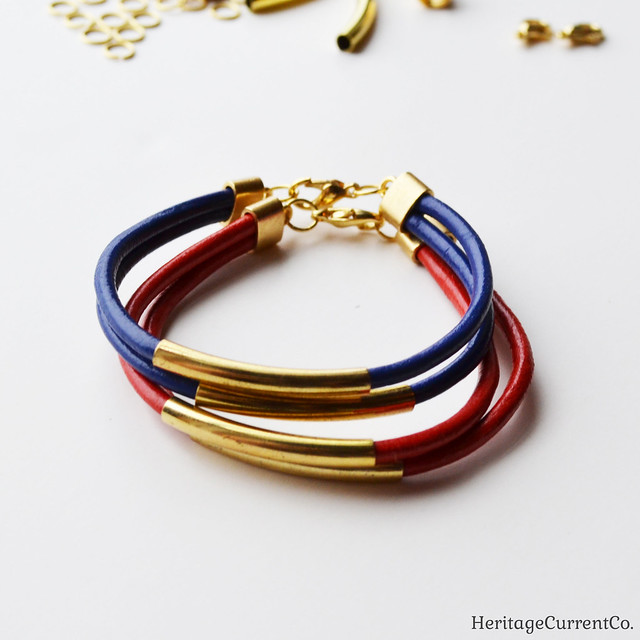
Here are the finished bracelets, stacked on top of each other like they would be on a wrist. Make as many or as few as you like - it's very easy to customize these in every way.

In my next post, I'll have a bonus project to use up your extra lengths of cord!


July 27, 2013

Moon and Stars Finds


I've always been a bit fascinated with the moon and stars, but I think the full moon this past week has really kicked it into high gear lately! This moon sticker from i3Lab would look great in a bedroom, high on a wall, or over a desk in a study.


These delicate pave diamond moon and stars necklaces by JayAndRenae are the perfect little bit of shimmer and shine. I like how the metal has an aged patina to it. It seems suitable, when you consider just how old the moon and stars really are!


Lastly, these full moon earrings by BeautySpot aren't your average studs. I always have a hard time finding wearable stud earrings that aren't fancy gemstones or slightly-boring balls, so these are perfect. They're interesting but wouldn't stand out too much from a distance and are in neutral gray and black. Very versatile!


July 12, 2013

DIY Monkey's Fist Knot Nautical Necklace


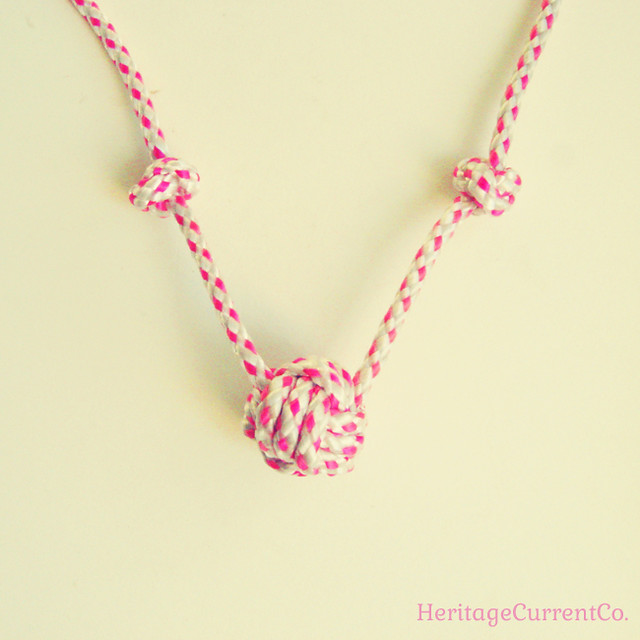
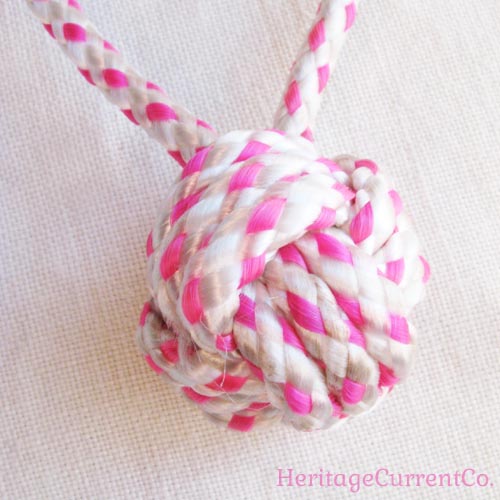
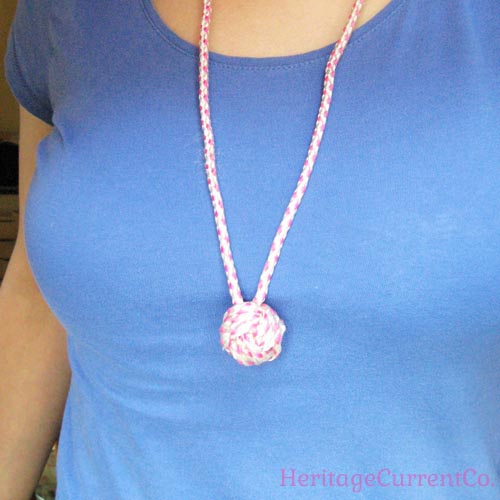
Today I have a jewelry tutorial for you guys! I'm going to show you how to make an easy, nautical-inspired Monkey's Fist Knot Necklace for summer. I've accented the monkey's fist shown here with some Oysterman's knots, just to add a little more detail and interest.

First, you're going to need some twine, rope, or clothesline. You don't want it too thick or your knot will be huge, but if you go too thin, you'll have the opposite problem. I used about 3 mm thick nylon pink and white rope. You can find this at a hardware store, or even in the home section of your local pharmacy store (like CVS, RiteAid, Brooks, and so on).

I'd use 4 - 5 feet, just to make sure you have enough. You can always trim off the extra at the end. I used the monkey's fist knot guide shown here for my necklace.


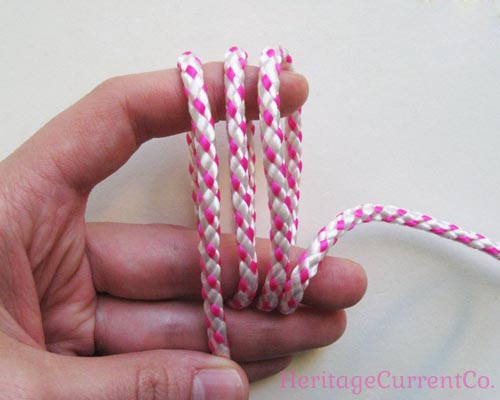
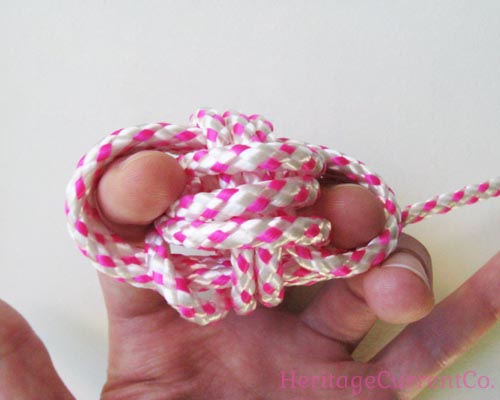
You start by going around three times like this. Leave a tail of at least 20 inches. In this photo, the tail is being held by my thumb. I used my fingers - placed at least two inches apart - to make my knot but if you have pegs or something like that, you could use them instead. You want to start with the "lead" end of your rope going away from you and over your top finger. You'll be making the loops clockwise.


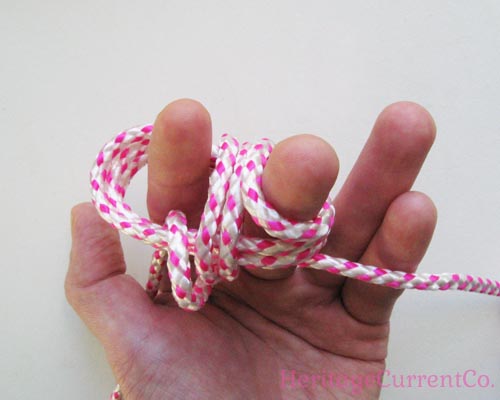
With your lead end going away from you and going counter-clockwise, make three more loops. Do not go through the loops you made in the first step - go around them instead. When you finish the last loop with the rope on the side facing you, put the end through the middle of the first loops. (That's how the lead end shows up in the top left here.)


Here's another view of this step, so you can see how I've held the beginning of the loops and how I've caught the first set of loops with the lead end after the last loop.


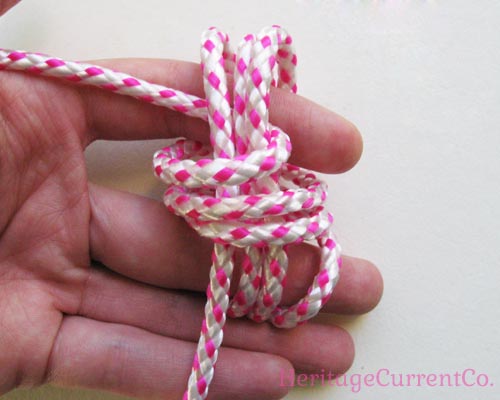
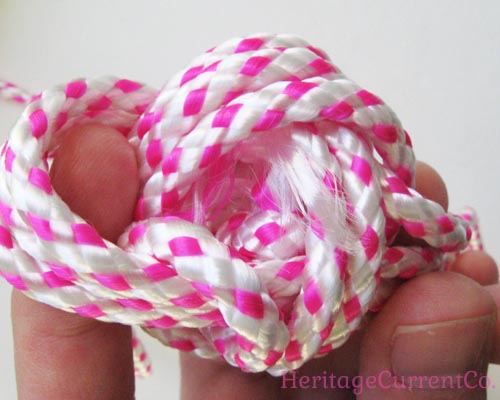
Make your final three loops, again going around the last set of loops you made but not going around the first set. You'll catch the beginning of the second set of loops - the one going halfway under my middle finger in the photo above this one - as you make the loops.


Here's another view of the last set of loops. You'll end with your lead end perpendicular to your original tail end and going away from you.


Here you can see the two ends - one lead and one original tail - at the top left and bottom center of the photo.


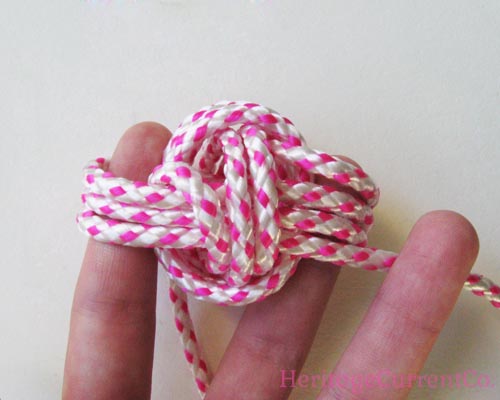
Your knot is done, so now you can start tightening it! Some people stick a small ball in the middle, others use pieces of rope. I did the latter, balling and knotting a small leftover piece and sticking it in the middle. Don't worry about pieces sticking out - you can tuck them in as you go around tightening it.

To tighten, start with either your lead end or your tail. I think I started with the tail. Go around the ball in the same order you made the loops, pulling them tight around your center until there are no spaces between the loops of rope.


After you're done tightening, it's time to make the sides of your necklace. I found that the angle of my lead end vs. my tail made the necklace hang in a strange way. So I cut one of the ends very close to where it came out of the ball, put strong adhesive glue on it, then tucked the end under the loops so it wouldn't show. To make a new side, I took a long piece of rope (I'd use about 20 inches), put strong adhesive glue on one end, and tucked it under a loop in the ball where I thought it would make a good angle for a necklace.

Your ball should be tight enough that the loops don't open up when you do this with the ends, but not so tight that you can't tuck any ends in and glue them. You'll get a feel for it very quickly! In this photo, you can see one angle I used.


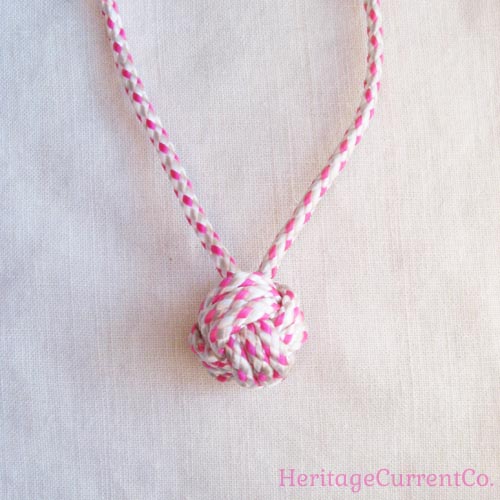
In this version, I used a smaller angle. I decided I liked the way the knot hung when I put the ends close to each other rather than on opposite sides of the monkey's fist ball.


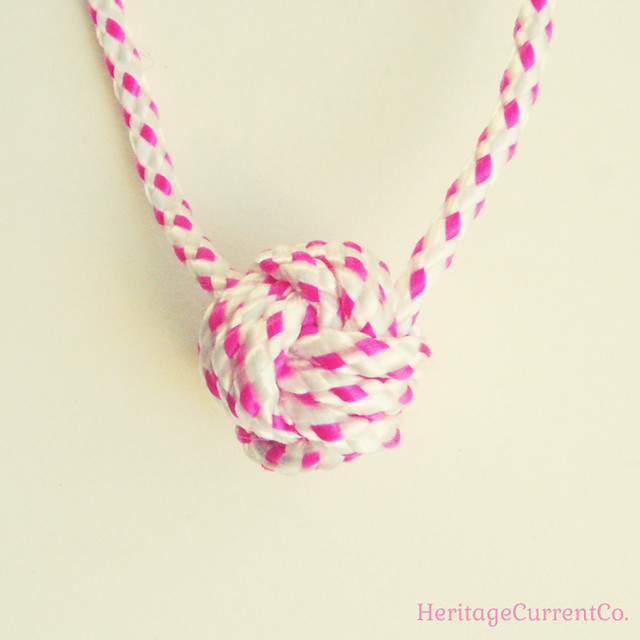
Here's a close-up of the knot and ball. Before you do the next step, let the glue dry thoroughly!


Once your glue has dried, you can wear the knot as is! Just trim the sides to the length you would like with a bit left over for tying a knot around your neck. I just did a simple knot, but you could do a more elaborate slip knot to make it look neater if you wanted to.


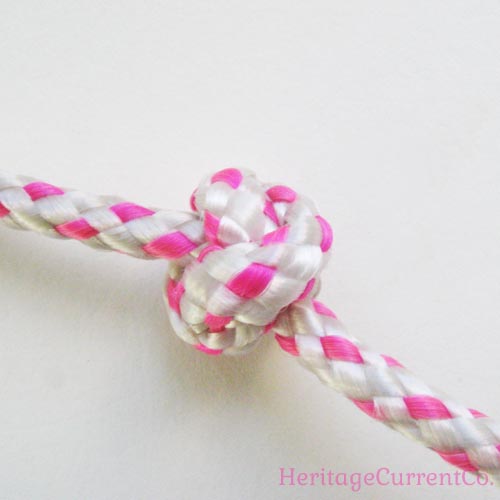
You can also add more knots to the sides to add a little more detail. That's what I chose to do. Here's a close-up of an Oysterman's Knot. I used this as a guide for tying them.


Make sure you space them evenly, so your necklace is nice and symmetrical. You can just loosen and tighten them up and down the sides until they're both at the same spot. And there you go! You now have an easy nautical necklace for the summer, perfect for long weekends at the beach or cabin, or just hanging out and enjoying the sunshine!

April 3, 2013

Spring Etsy Finds


I just thought I'd share some of the spring Etsy finds I've been loving lately! 

I've become a little obsessed with Marimo moss. The balls are bright green and velvety! The moss is actually an algae that likes to live in water and is easy to grow. You can buy this premade Japanese Marimo moss ball terrarium by Pink Serissa for instant greenery and detail in your home, or you could purchase a moss ball and some pebbles and make your own.


Spring seems to call for simple jewelry to match with flowing, colorful dresses, and these sterling silver teardrop dangle earrings by Popsicle Drum are the perfect accent. The hammered surface adds subtle detail, and the size is just right. I also like that they're dangly, so they'll move with you or in the breeze like a tiny windchime.


This beach limpet shell pendant necklace by Rock Rose Jewellery is another great simple piece. Limpets are one of my favorite shells to collect, so this lovely silver pendant also reminds me of happy childhood summer days at the beach!


To go along with the simple jewelry theme, here's a delicate gold bar nameplate necklace by Momentus NY. I like the classic look - it's not something that will go out of style. The nameplate bar is also different than the usual round or oval name pendants that you see.


I've always been fascinated by cuckoo clocks, but I've never seen them given a modern twist before! These neon pink and gold cuckoo clocks by Gallivanting Girls are classic cuckoo clocks from Germany that have been painted in hot pink, gold, and white. I think they'd be perfect in a modern white living room or hallway. I wonder if the bird inside has been painted, too!

What Etsy finds are you loving so far this spring?

February 5, 2013

Valentine's Day Gift Guide


Valentine's Day is right around the corner! While I may not be an expert on what to get guys for Christmas (I usually just make him candy and buy a sweet card), I have an easier time picking out things for females. So here are things I think any female would like for VDay. Maybe they'll end up on your wishlist, too!

Most of the time, valentines feature cupids and birds. I like that this card by Artist in La La Land features a squirrel instead. It's quirky yet adorable!


I think I first fell in love with pave key necklaces when Tiffany's came out with some a few years ago. I like the more antique look of this pave diamond key necklace by LexLuxe, though, and the combination of silver *and* gold. I like its dainty size as well - it makes it more versatile so you can wear it at work during the day or out at night.


Lavender symbolizes devotion in the "language of flowers", so it works perfectly in these heart ornaments by Handy Happy Hearts. They'd be lovely hung from doorknobs, or from hooks on doors or windowsills. I'm sure they smell amazing as well!


This XO kiss hugs initials necklace by Sora Designs is simple yet lovely. I like that it can work as a gift from a significant other or as just a friendship necklace. I think I might even like this simple "x" and "o" version shown the best. It's like carrying a kiss and hug from someone you care about - whether it's a friend, family member, or partner - around with you all the time.


These remind me of the heart-shaped ones dotted with white paint that would be handed out during classroom Valentine's Day parties. These grown-up versions by Sophia Victoria Joy look like they taste even better, and the personalized tag is a cute touch.


I'm a sucker for tiny heart-shaped necklaces, so this rose gold vermeil heart pendant by Lustre Modern Jewelry became an instant fave. It's classic and will never go out of style.


Owls are very "in" right now, so these mom & baby owl cookie cutters by DIY Sweet Supply Co. would be perfect for "owl always love you"-themed cookies or brownies. They could also be reused later for baby showers or birthday parties.


The Hunger Games book and movie spurred on the arrow craze, but this could be Cupid's bow as well! This  golden bow and arrow necklace by Datter is my favorite version that I've seen. I like that the arrow is on a separate link so it trembles as you move.


This heart-dotted ceramic bowl by Ross Lab is great for VDay, but can also be used every day. I love the adorable little hearts and the bright pink interior.


This gold and moissanite bow ring by JC Metalsmith Jewelry harkens back to Victorian times. It's labeled as an engagement ring, but I think the non-traditional bow shape means it could be a statement ring or just a fun piece of jewelry as well. It's very rare to find an original Victorian version, so this modern vintage one is a great alternative!

What are you hoping to get for Valentine's Day? What have you bought for other people?


You Might Also Like:

Related Posts Plugin for WordPress, Blogger...