Showing posts with label necklace. Show all posts

July 15, 2014

DIY Button Badge Necklace - Prep Style/British Style


Finally back with a tutorial! I know it's been awhile, apologies for the rust. I don't know about you guys, but once the Fourth of July passes, I start looking forward to fall. Maybe it's because I don't adapt to scorching temperatures very well (my best coping mechanism is mass popsicle consumption) or maybe it's simply because autumn is my favorite season. At any rate, it already feels like back to school and cooler days are just around the corner.

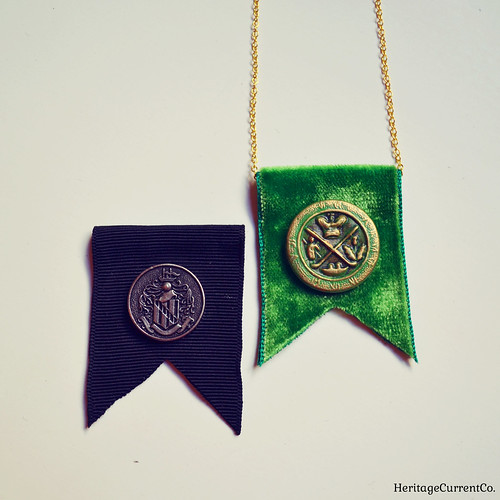
So, here's my contribution to the prep school style that will soon dominate! A simple badge necklace made with fabric, buttons, and chain that's oh-so-easy and easily adaptable to your personal style.


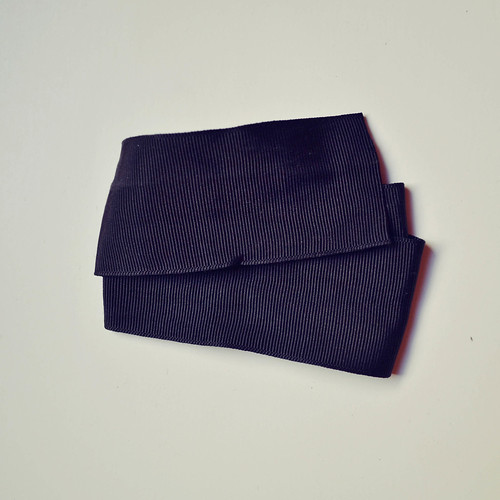
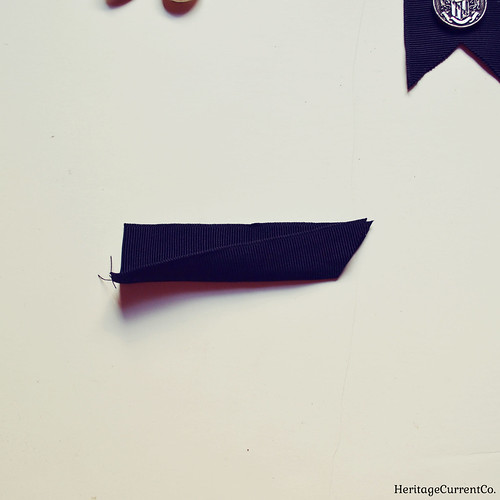
First, pick your ribbon. Here I have some vintage black grosgrain, although I also used the vintage green velvet shown in the previous photo.


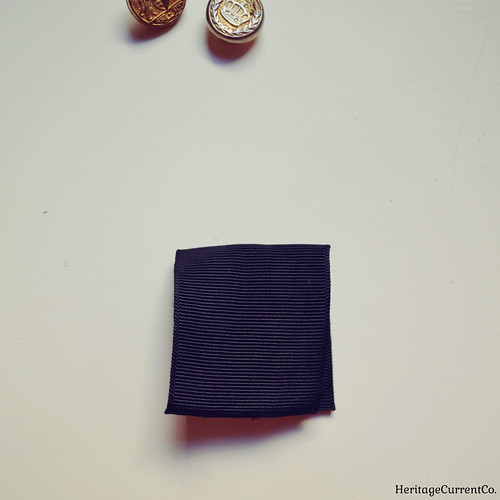
Cut a length of ribbon - I think I used around 3 inches. Make it as long or as short as you like, though! Then fold your ribbon in half and line up the edges.


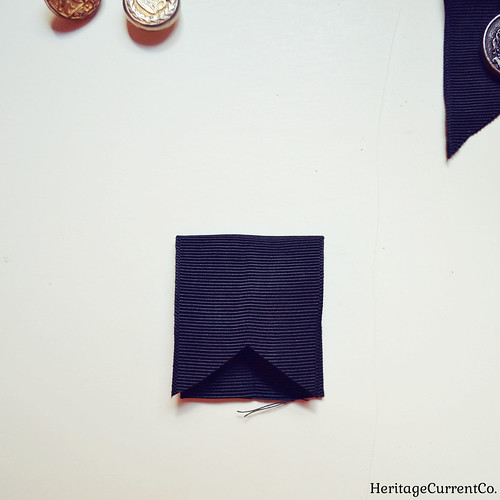
Measure your center point, and then snip out a triangle on the top layer with its top point at your center point. You can make the snip as shallow or as deep as you like. I made this one a bit shallow, but I think I prefer the deeper V of the green ribbon.


Fold your ribbon in half vertically, lining up the edges, and then use the first triangle you snipped as a guide to cut the bottom layer.


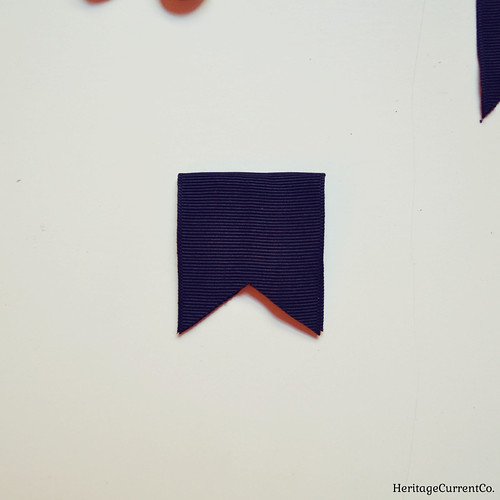
Flatten out again, and use your scissors to even up edges or make adjustments if necessary.


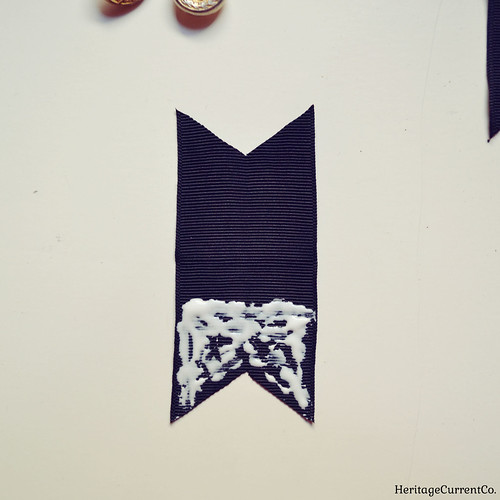
Open up your snipped ribbon, and slather fabric glue over the bottom two-thirds or so of your badge. Don't go all the way to the fold, as you'll need a space to thread your chain through. Try not to use a heavy hand as well, as the glue will flatten and spread out. Re-fold your badge, making sure the edges line up, and smooth out the fabric if there are any thick patches of glue. Let dry thoroughly. 


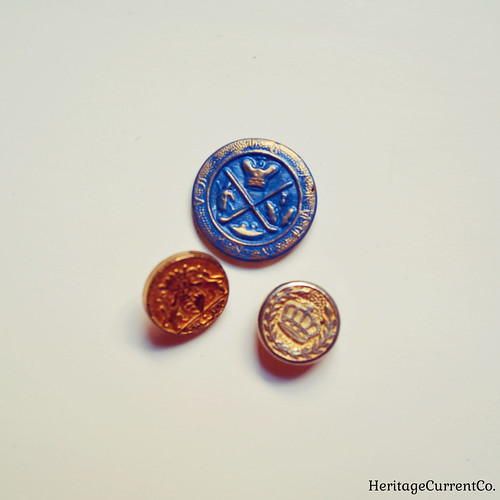
Now it's time to pick your button! I like metallic ones with heraldic-style images for a preppy/British look, but go with whatever you like. The blue Scottish-themed one shown here was originally a dark brass domed version that I flattened with pliers, painted blue, then gilded the raised details of with Rub 'N Buff. In retrospect, I think I would've liked it better domed. What do you think?


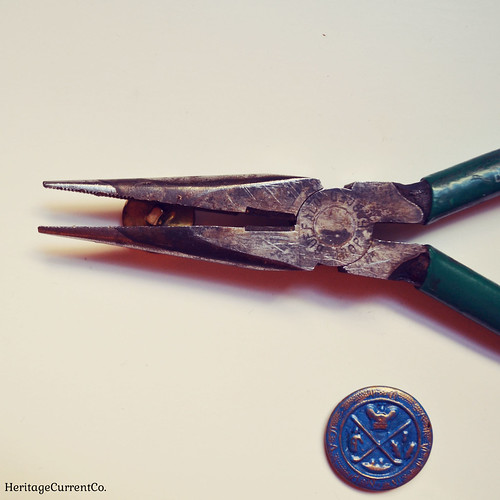
To make your buttons lie flat against the ribbon, use needle-nose pliers to take the back hole off. There's no one good way to do this, to be honest! I just kind of grip the sides with the pliers and twist/rock the button until it comes off. A file might work as well, or strong scissors. A lot of metal buttons are really good gold plastic fakes, so their backs will come right off.


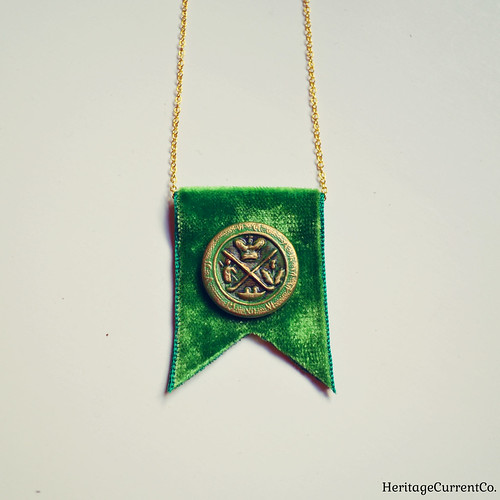
Put glue on the back of your button, center it vertically and horizontally, then let dry. String chain of your choosing through the badge and add a clasp, and you're done! Gold and green is one of my favorite color combinations, so I love this one I made. I think I'm also going to create herringbone, tweed, and plaid ribbon badges.

If you had nautical-themed buttons, you could make very summer-y versions with gold chain, navy ribbon, and lobster or anchor buttons or charms. You could even substitute thin white rope for the chain for a sailor knot-style look. And with that, I'm off to the craft store...

November 7, 2013

DIY Chandelier Crystal, Lapis, and Gold Necklace


Like my DIY bead bar necklaces, this is another super-simple tutorial. Take an octagonal chandelier crystal with holes drilled on opposite sides (you can buy these online, I found mine in the "Supplies" section of Etsy) and then pick out a teardrop shaped bead. I used one that's about an inch long, and made of lapis-colored glass since I really like the combination of white, blue, and gold together. You could also go with a pearl drop, green glass drop, or even a gold one. You could use a round bead as well, but I think the teardrop shape balances out the octagonal crystal better - I think you need something longer than the crystal to give it a lavalier-type look.

My chandelier crystal still had one original hanging wire attached, so I simply slipped a large gold jump ring onto it and then closed the loop. The crystal also had a drilled hole at the bottom, so I simple slipped a large gold jump ring through it, added the lapis, then closed it. I strung this onto gold-plated chain, and instantly had an elegant, vintage-inspired necklace to wear. So easy, right? I think it looks very 1920s England/Downton Abbey-esque. What do you think?

Since you usually have to buy multiple beads at a time, the extras would be great for turning into one-of-a-kind holiday or birthday gifts for friends and family.

October 25, 2013

DIY Bead/Gem and Gold Wire Bar Necklaces


I don't know if I should actually call this post about DIY bead/gem and gold wire bar necklaces a tutorial, it's so simple that you really don't need more than a few basic instructions!

First, pick out some fairly thick gold wire. I used 40 gauge. Use something thick enough that it will hold its shape and not get bent easily with wear. Then select matching gold (either real, gold-plated, or gold tone - your choice!) chain. Make sure the links are wide enough to slip onto the wire.


Cut a length of wire with the wire-cutting part of your pliers. I usually do about three inches, leaving myself extra that I can cut off later. Take a pair of needle-nose pliers, and form a loop at one end, as shown. Slip the chain onto the loop, and tighten the loop to close it.

Then just add your beads! Make sure their openings are wide enough to fit onto the wire. In the first picture here, you can see I used some diamond shaped green glass beads and then irregular white quartz ones. Put on as many or as few beads as you wish. I made my line of beads about 2 - 2.5 inches long. Leave a bit of wire to form a loop, then cut off the extra. Form your second loop, doing the best you can to make it match the shape of your first one (you can fiddle with both loops after to make them match, or just leave as is - to be honest, people probably won't notice!). Before you tighten it, slip on the other end of your chain. Then close the loop. That's it!

I like my necklaces long, so I used about 30 inches of chain. Since this makes it easy to slip the necklaces over my head, I didn't need a clasp. If you want a shorter necklace that needs a clasp, I'd cut two lengths of chain and slip one end of each onto each loop, and then add your clasps. When you do this part, remember that one side of the clasp (the one with the hook you open) will be longer than the other. So, make that section of chain just a bit shorter so that when you line up each piece of chain with your clasp pieces, the total lengths end up being equal. Is this clear? If not, let me know and I'll add a picture!

Since these bar necklaces have sparkle and shine, they'd be make great accessories for holiday parties. They also make inexpensive, easy Christmas and holiday gifts for your friends and family!

July 12, 2013

DIY Monkey's Fist Knot Nautical Necklace


Today I have a jewelry tutorial for you guys! I'm going to show you how to make an easy, nautical-inspired Monkey's Fist Knot Necklace for summer. I've accented the monkey's fist shown here with some Oysterman's knots, just to add a little more detail and interest.

First, you're going to need some twine, rope, or clothesline. You don't want it too thick or your knot will be huge, but if you go too thin, you'll have the opposite problem. I used about 3 mm thick nylon pink and white rope. You can find this at a hardware store, or even in the home section of your local pharmacy store (like CVS, RiteAid, Brooks, and so on).

I'd use 4 - 5 feet, just to make sure you have enough. You can always trim off the extra at the end. I used the monkey's fist knot guide shown here for my necklace.


You start by going around three times like this. Leave a tail of at least 20 inches. In this photo, the tail is being held by my thumb. I used my fingers - placed at least two inches apart - to make my knot but if you have pegs or something like that, you could use them instead. You want to start with the "lead" end of your rope going away from you and over your top finger. You'll be making the loops clockwise.


With your lead end going away from you and going counter-clockwise, make three more loops. Do not go through the loops you made in the first step - go around them instead. When you finish the last loop with the rope on the side facing you, put the end through the middle of the first loops. (That's how the lead end shows up in the top left here.)


Here's another view of this step, so you can see how I've held the beginning of the loops and how I've caught the first set of loops with the lead end after the last loop.


Make your final three loops, again going around the last set of loops you made but not going around the first set. You'll catch the beginning of the second set of loops - the one going halfway under my middle finger in the photo above this one - as you make the loops.


Here's another view of the last set of loops. You'll end with your lead end perpendicular to your original tail end and going away from you.


Here you can see the two ends - one lead and one original tail - at the top left and bottom center of the photo.


Your knot is done, so now you can start tightening it! Some people stick a small ball in the middle, others use pieces of rope. I did the latter, balling and knotting a small leftover piece and sticking it in the middle. Don't worry about pieces sticking out - you can tuck them in as you go around tightening it.

To tighten, start with either your lead end or your tail. I think I started with the tail. Go around the ball in the same order you made the loops, pulling them tight around your center until there are no spaces between the loops of rope.


After you're done tightening, it's time to make the sides of your necklace. I found that the angle of my lead end vs. my tail made the necklace hang in a strange way. So I cut one of the ends very close to where it came out of the ball, put strong adhesive glue on it, then tucked the end under the loops so it wouldn't show. To make a new side, I took a long piece of rope (I'd use about 20 inches), put strong adhesive glue on one end, and tucked it under a loop in the ball where I thought it would make a good angle for a necklace.

Your ball should be tight enough that the loops don't open up when you do this with the ends, but not so tight that you can't tuck any ends in and glue them. You'll get a feel for it very quickly! In this photo, you can see one angle I used.


In this version, I used a smaller angle. I decided I liked the way the knot hung when I put the ends close to each other rather than on opposite sides of the monkey's fist ball.


Here's a close-up of the knot and ball. Before you do the next step, let the glue dry thoroughly!


Once your glue has dried, you can wear the knot as is! Just trim the sides to the length you would like with a bit left over for tying a knot around your neck. I just did a simple knot, but you could do a more elaborate slip knot to make it look neater if you wanted to.


You can also add more knots to the sides to add a little more detail. That's what I chose to do. Here's a close-up of an Oysterman's Knot. I used this as a guide for tying them.


Make sure you space them evenly, so your necklace is nice and symmetrical. You can just loosen and tighten them up and down the sides until they're both at the same spot. And there you go! You now have an easy nautical necklace for the summer, perfect for long weekends at the beach or cabin, or just hanging out and enjoying the sunshine!

October 4, 2012

Under This Moon Necklace


Gemagenta's "Under This Moon" pendant is definitely one of the most original ideas I've seen on Etsy lately.

When you give her your birthday, she looks up what phase the moon was in and then recreates it in pendant form. She even etches in the little craters and blackens in the part in shadow (for anyone not born under a full moon). I love the presentation and packaging as well. It makes it extra-special and shows how much care she's put into the piece. I know what's on my Christmas list!...(*cough* husband take note *cough*).

You Might Also Like:

Related Posts Plugin for WordPress, Blogger...