Showing posts with label shiny. Show all posts

November 7, 2013

DIY Chandelier Crystal, Lapis, and Gold Necklace


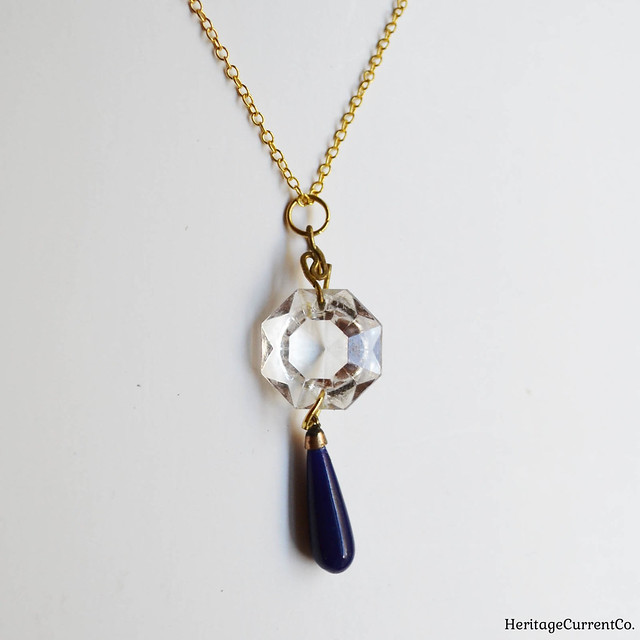
Like my DIY bead bar necklaces, this is another super-simple tutorial. Take an octagonal chandelier crystal with holes drilled on opposite sides (you can buy these online, I found mine in the "Supplies" section of Etsy) and then pick out a teardrop shaped bead. I used one that's about an inch long, and made of lapis-colored glass since I really like the combination of white, blue, and gold together. You could also go with a pearl drop, green glass drop, or even a gold one. You could use a round bead as well, but I think the teardrop shape balances out the octagonal crystal better - I think you need something longer than the crystal to give it a lavalier-type look.

My chandelier crystal still had one original hanging wire attached, so I simply slipped a large gold jump ring onto it and then closed the loop. The crystal also had a drilled hole at the bottom, so I simple slipped a large gold jump ring through it, added the lapis, then closed it. I strung this onto gold-plated chain, and instantly had an elegant, vintage-inspired necklace to wear. So easy, right? I think it looks very 1920s England/Downton Abbey-esque. What do you think?

Since you usually have to buy multiple beads at a time, the extras would be great for turning into one-of-a-kind holiday or birthday gifts for friends and family.

October 25, 2013

DIY Bead/Gem and Gold Wire Bar Necklaces


I don't know if I should actually call this post about DIY bead/gem and gold wire bar necklaces a tutorial, it's so simple that you really don't need more than a few basic instructions!

First, pick out some fairly thick gold wire. I used 40 gauge. Use something thick enough that it will hold its shape and not get bent easily with wear. Then select matching gold (either real, gold-plated, or gold tone - your choice!) chain. Make sure the links are wide enough to slip onto the wire.


Cut a length of wire with the wire-cutting part of your pliers. I usually do about three inches, leaving myself extra that I can cut off later. Take a pair of needle-nose pliers, and form a loop at one end, as shown. Slip the chain onto the loop, and tighten the loop to close it.

Then just add your beads! Make sure their openings are wide enough to fit onto the wire. In the first picture here, you can see I used some diamond shaped green glass beads and then irregular white quartz ones. Put on as many or as few beads as you wish. I made my line of beads about 2 - 2.5 inches long. Leave a bit of wire to form a loop, then cut off the extra. Form your second loop, doing the best you can to make it match the shape of your first one (you can fiddle with both loops after to make them match, or just leave as is - to be honest, people probably won't notice!). Before you tighten it, slip on the other end of your chain. Then close the loop. That's it!

I like my necklaces long, so I used about 30 inches of chain. Since this makes it easy to slip the necklaces over my head, I didn't need a clasp. If you want a shorter necklace that needs a clasp, I'd cut two lengths of chain and slip one end of each onto each loop, and then add your clasps. When you do this part, remember that one side of the clasp (the one with the hook you open) will be longer than the other. So, make that section of chain just a bit shorter so that when you line up each piece of chain with your clasp pieces, the total lengths end up being equal. Is this clear? If not, let me know and I'll add a picture!

Since these bar necklaces have sparkle and shine, they'd be make great accessories for holiday parties. They also make inexpensive, easy Christmas and holiday gifts for your friends and family!

You Might Also Like:

Related Posts Plugin for WordPress, Blogger...