

Today I have a jewelry tutorial for you guys! I'm going to show you how to make an easy, nautical-inspired Monkey's Fist Knot Necklace for summer. I've accented the monkey's fist shown here with some Oysterman's knots, just to add a little more detail and interest.
First, you're going to need some twine, rope, or clothesline. You don't want it too thick or your knot will be huge, but if you go too thin, you'll have the opposite problem. I used about 3 mm thick nylon pink and white rope. You can find this at a hardware store, or even in the home section of your local pharmacy store (like CVS, RiteAid, Brooks, and so on).
I'd use 4 - 5 feet, just to make sure you have enough. You can always trim off the extra at the end. I used the monkey's fist knot guide shown here for my necklace.
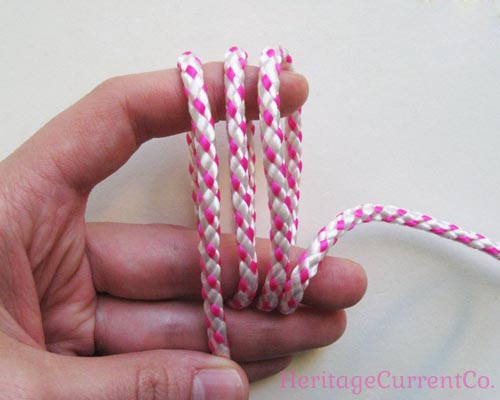
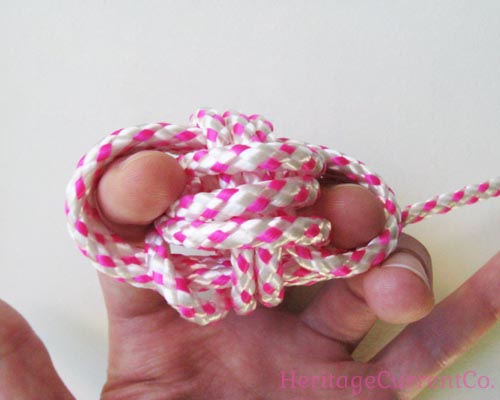
You start by going around three times like this. Leave a tail of at least 20 inches. In this photo, the tail is being held by my thumb. I used my fingers - placed at least two inches apart - to make my knot but if you have pegs or something like that, you could use them instead. You want to start with the "lead" end of your rope going away from you and over your top finger. You'll be making the loops clockwise.
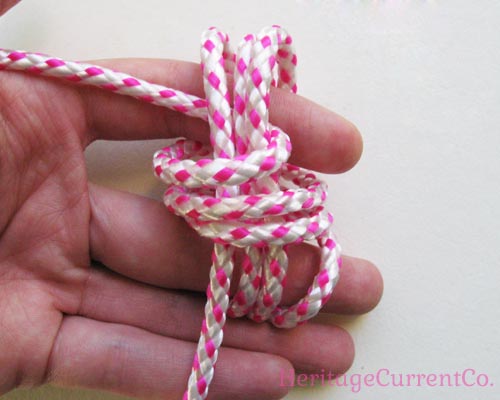
With your lead end going away from you and going counter-clockwise, make three more loops. Do not go through the loops you made in the first step - go around them instead. When you finish the last loop with the rope on the side facing you, put the end through the middle of the first loops. (That's how the lead end shows up in the top left here.)
Here's another view of this step, so you can see how I've held the beginning of the loops and how I've caught the first set of loops with the lead end after the last loop.
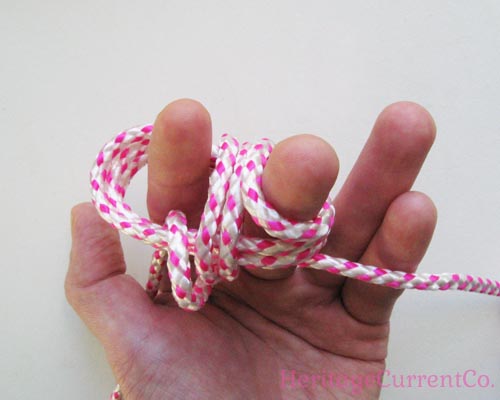
Make your final three loops, again going around the last set of loops you made but not going around the first set. You'll catch the beginning of the second set of loops - the one going halfway under my middle finger in the photo above this one - as you make the loops.
Here's another view of the last set of loops. You'll end with your lead end perpendicular to your original tail end and going away from you.

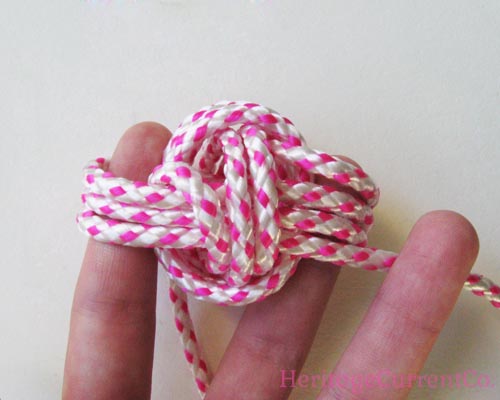
Here you can see the two ends - one lead and one original tail - at the top left and bottom center of the photo.
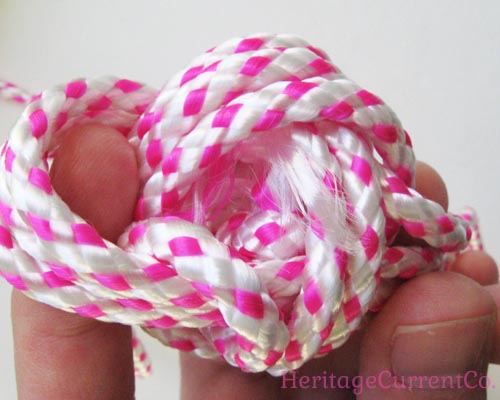
Your knot is done, so now you can start tightening it! Some people stick a small ball in the middle, others use pieces of rope. I did the latter, balling and knotting a small leftover piece and sticking it in the middle. Don't worry about pieces sticking out - you can tuck them in as you go around tightening it.
To tighten, start with either your lead end or your tail. I think I started with the tail. Go around the ball in the same order you made the loops, pulling them tight around your center until there are no spaces between the loops of rope.
After you're done tightening, it's time to make the sides of your necklace. I found that the angle of my lead end vs. my tail made the necklace hang in a strange way. So I cut one of the ends very close to where it came out of the ball, put strong adhesive glue on it, then tucked the end under the loops so it wouldn't show. To make a new side, I took a long piece of rope (I'd use about 20 inches), put strong adhesive glue on one end, and tucked it under a loop in the ball where I thought it would make a good angle for a necklace.
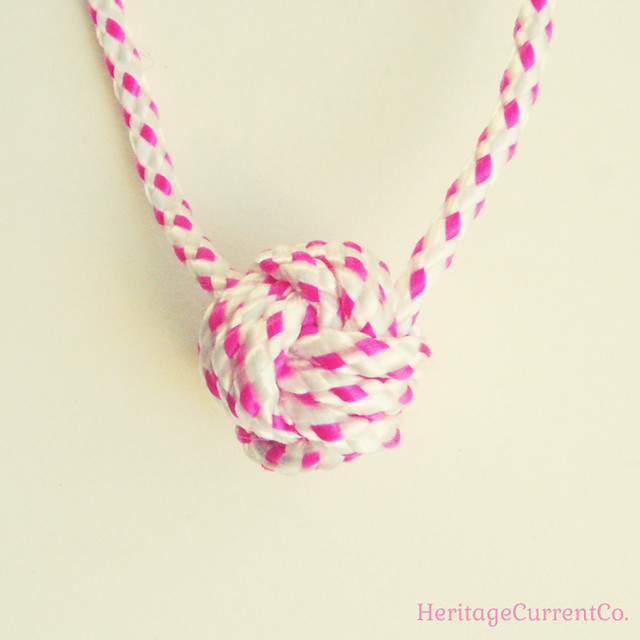
Your ball should be tight enough that the loops don't open up when you do this with the ends, but not so tight that you can't tuck any ends in and glue them. You'll get a feel for it very quickly! In this photo, you can see one angle I used.
In this version, I used a smaller angle. I decided I liked the way the knot hung when I put the ends close to each other rather than on opposite sides of the monkey's fist ball.
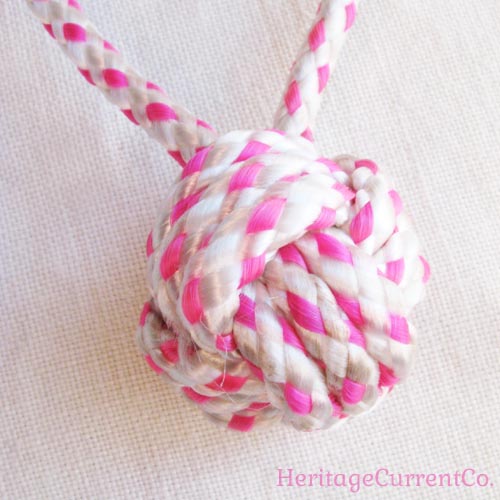
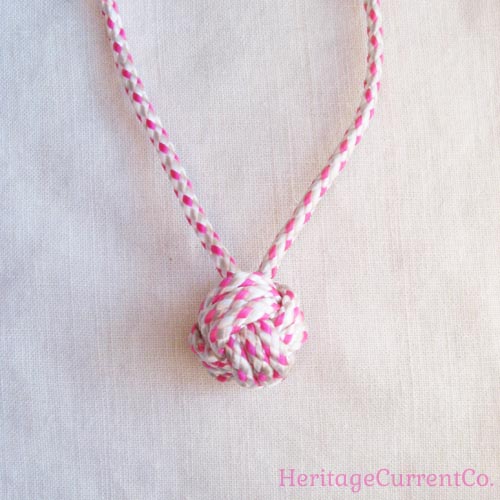
Here's a close-up of the knot and ball. Before you do the next step, let the glue dry thoroughly!
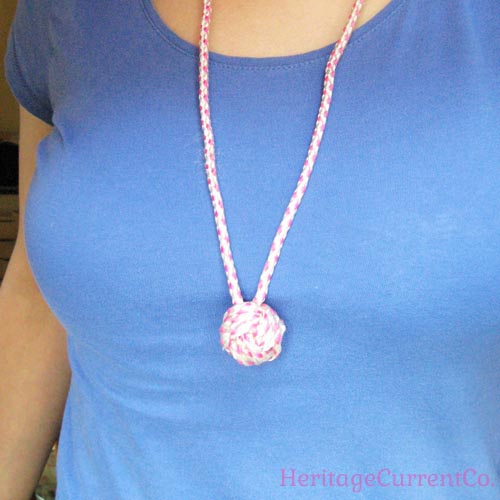
Once your glue has dried, you can wear the knot as is! Just trim the sides to the length you would like with a bit left over for tying a knot around your neck. I just did a simple knot, but you could do a more elaborate slip knot to make it look neater if you wanted to.
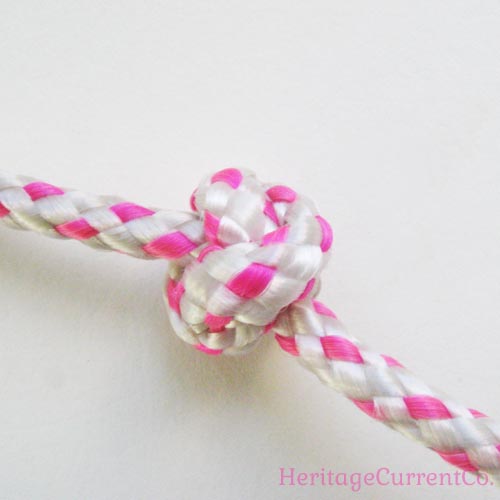
You can also add more knots to the sides to add a little more detail. That's what I chose to do. Here's a close-up of an Oysterman's Knot. I used this as a guide for tying them.
Make sure you space them evenly, so your necklace is nice and symmetrical. You can just loosen and tighten them up and down the sides until they're both at the same spot. And there you go! You now have an easy nautical necklace for the summer, perfect for long weekends at the beach or cabin, or just hanging out and enjoying the sunshine!
No comments:
Post a Comment