

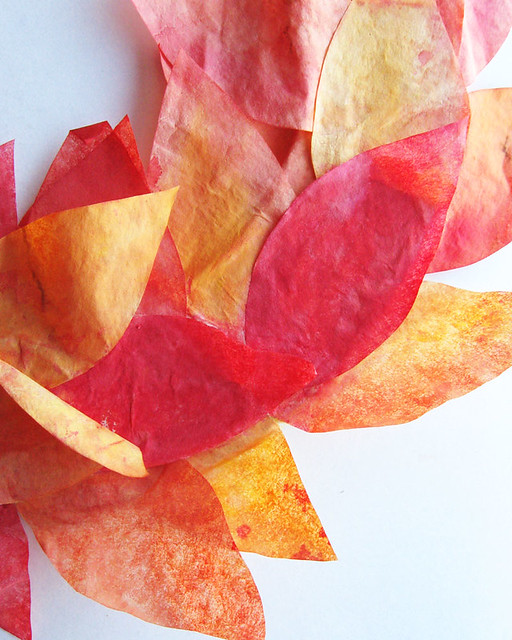
Would you believe me if I told you these colorful leaves were made out of coffee filters? Yup - that's the simple secret to their crinkly texture and brown undertones! I ran about 50 natural brown coffee filters under the tap and then spread them out flat to dry in single layers (if possible, if not, stack them in piles of two or three and rotate which ones are on top every half-hour or so) on cookie sheets around the kitchen. If you have a gas stove with pilots, putting the sheets over the burners helps speed up the process - just keep a careful eye on them! (Or maybe I'm just still wary of open flames - I grew up with electric ovens.)
Next, I made leaf stencils out of paper and used them to cut out leaves from the dried filters. This is the part that, to be honest, is kind of a pain in the butt. It's time-consuming and it can be difficult to get all the curves and corners, but it's worth it in the end! If you have a Cricut (sp?) or another die-cutter, you could give it a whirl instead of cutting each one out by hand. I made four stencils: two types of oak leaves, a maple leaf, and a fruit tree leaf. Cut as many as you think you will need - I think I got two or three big leaves out of each filter, and ended up with about 25 of the oaks and maple and 50 of the fruit tree (since they were smaller).
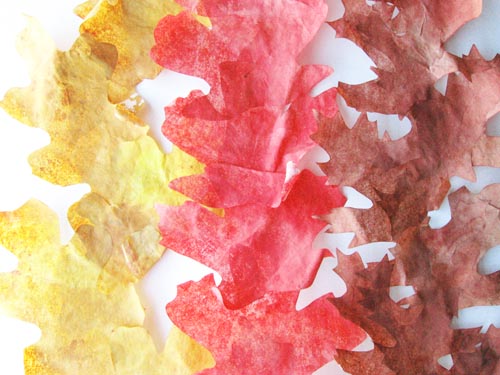
Then came the fun part: painting them! I used watercolors in shades of brown, red, orange, and gold. I tried to make some areas lighter and some darker, to imitate real leaves. I initially painted them after gluing them into garlands, but then I realized doing it the other way (paint each one first, then glue together) was probably much easier. If you do it the first way, you have to make sure you get under each leaf and sometimes the wet paint made them stick together in other places.
I glued the maple and oak leaves into garlands. You could mix them if you like, I just chose to use a single type for each. I used a glue stick and rotated the first one 45 degrees left from center, the second below it 45 degrees right from center (so 90 degrees from the first after), the third below it 45 degrees left from center (90 degrees from the second leaf), etc. You could use the same angle, or do them in a straight line. You could rotate them even more, too - just play around with them until you get something you like!
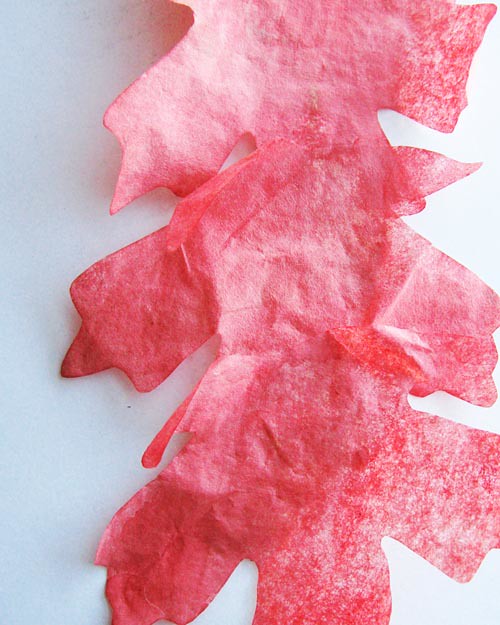
Close-up of the maple leaves that I painted bright red.
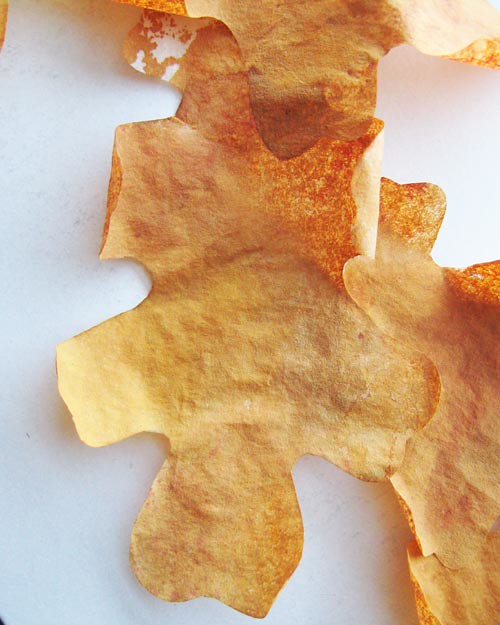
Close-up of the gold oak leaves - you can see where I missed a spot as I painted them post-gluing. Oops!
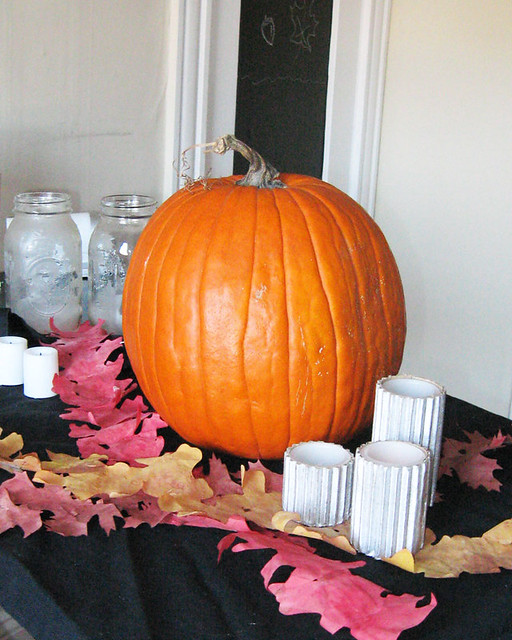
Once your garlands have dried, use them around the house for decorations! Here, I overlaid them on a table and then added a pumpkin and silver candles (DIY coming later in November) for a festive display.
You could also put the garlands up on the wall, hang them down a door or doorway, or string them along a mantle. Since they're not Halloween-ish at all, you can use them from the beginning of fall through Thanksgiving - they're very versatile!
To make your Thanksgiving table even more festive, you could run the garlands down the length of the table, add a silver vase of brown and white feathers (or mallard green ones) in the middle, and then add in small gourds, pumpkins, dark purple artichokes, pomegranates, bright red apples, or small silver dishes of nuts for extra pops of color.
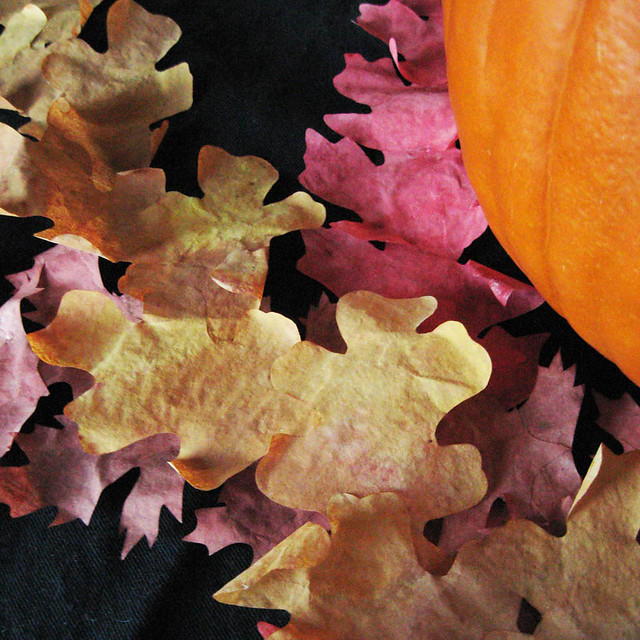
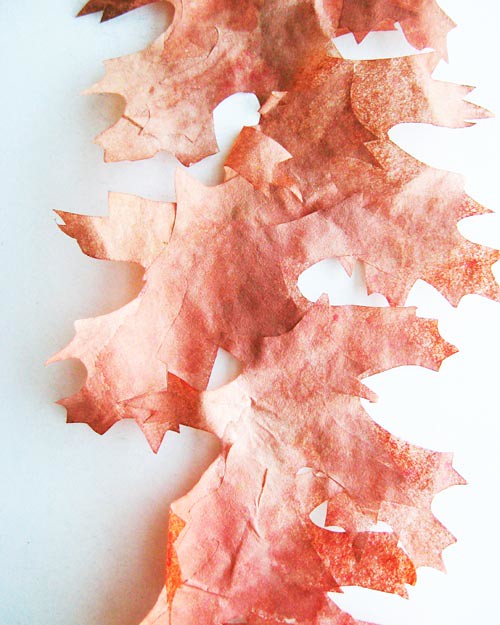
Here's a close-up of the garlands overlapping.
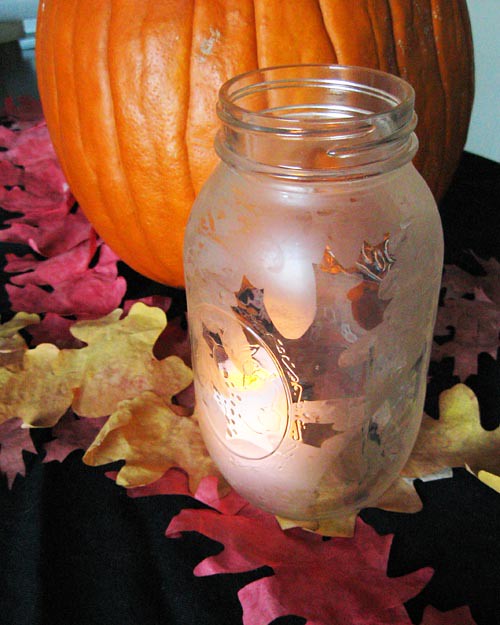
Instead of candles, you could add fall lanterns as well. I made these out of mason jars, contact paper stencils, and etching cream. Then I placed an LED light inside. These lanterns will be in the next DIY post!...
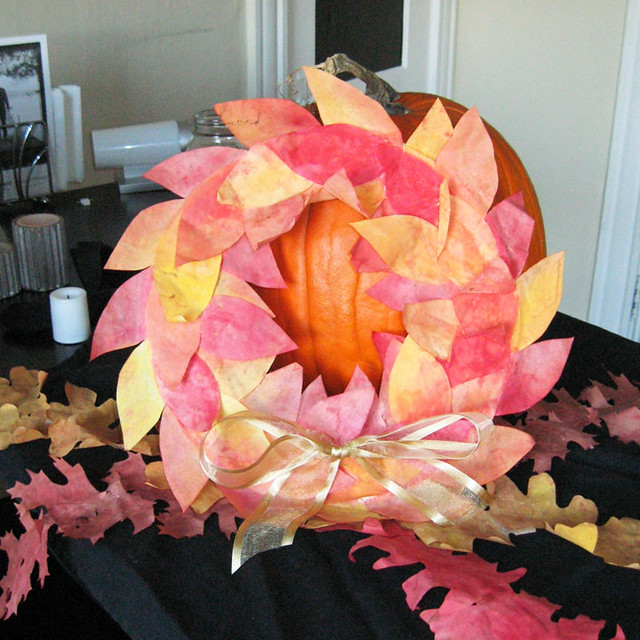
I turned the fruit tree leaves into a wreath. Storage space is at a premium in our city apartment, so I wanted fall decor that would store flat to maximize space. This is bright and perfect for the season but will take up barely any space in the closet come Christmas - perfect! I painted the leaves just like the other ones, then arranged them in layers of three around a wreath form. I made my own out of cardboard using a big plate for the outer edge and smaller one for the cut-out part in the middle, but you could use one from a craft store. I just didn't have one handy (and again, I wanted something more 2D). I curled some of the leaves up using a pencil to give the wreath a little more dimension, and then added a bow of gold ribbon.
Close-up of the wreath.
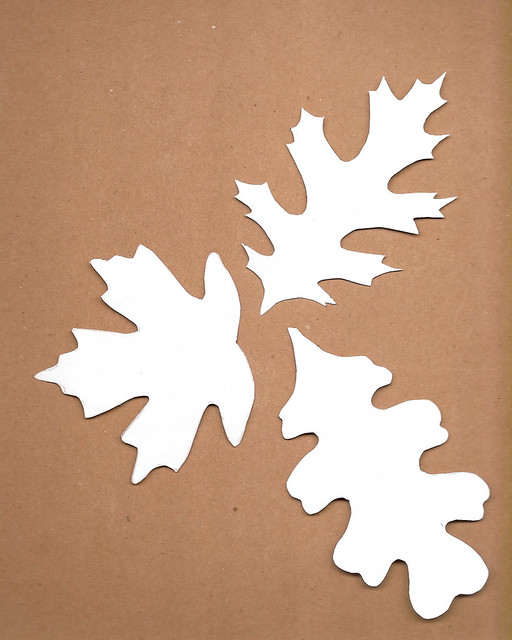
Here are three of the stencils I used (the fruit tree one seems to have gone missing, but it's easy to recreate). You may use these for your own projects (resize them when you print them to suit your project) but please don't resell them or use them for commercial projects without written permission from me. Thanks!
No comments:
Post a Comment