Showing posts with label centerpieces. Show all posts

March 27, 2013

Easter Table Inspiration


Easter's almost here, and luckily, my cold is almost gone! (Hence the lack of posts.) I've been combing through Pinterest, looking for easy and inexpensive ideas for our Easter table.

I love these simple eggs cup posies from Martha Stewart. Just use take a dyed and hollowed-out Easter egg, tap the top with a spoon to crack it off, then place it in an egg cup. Add water to the inside of the egg and a few sprigs of lily of the valley, lilacs, or pansies and you have lovely little arrangements to place down the center of your table or around the house!


I've been seeing a lot of tulips combined with pussywillow sprigs for centerpieces. I love the way the colors and textures play off of each other in this one. I think I might try blush pink tulips with the leaves removed, and slightly taller sprigs of pussywillow. If you really wanted to be festive, you could arrange them inside a basket.


I've never tried my hand at elaborate napkin folding, but these adorable bunny versions might make me give it a go! The sprigs of pussywillows meant to look like a "cotton" tail really make these lovely. You could also use a real cotton boll or use a ball of bright green moss. This site is in German, but if your browser has a translation service, there are instructions included.

I hope you all have a wonderful holiday, and good weather for your Easter activities and Easter egg hunts!

December 8, 2012

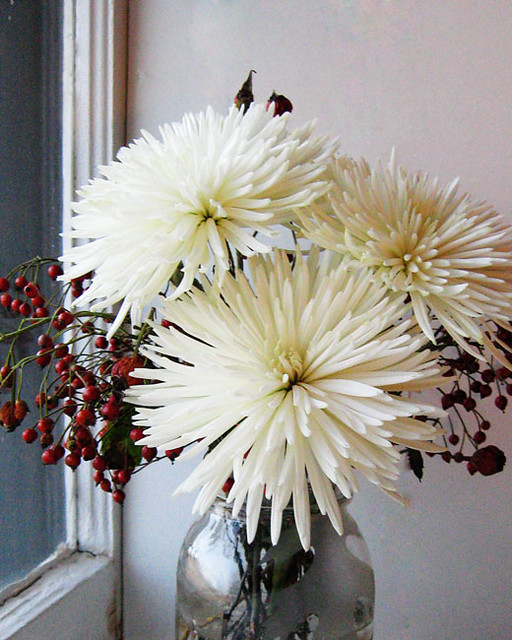
Rose Hips and White Spider Mums


Just wanted to add a note to my earlier post about arranging rose hips for a simple late fall/winter table centerpiece.

I ended up adding in some inexpensive mums to mine after a couple weeks (the rose hips last forever!), and I really love the way the white mums pop against the deep reds of the rose hips. It's very Christmas-y without using the obvious evergreen and holly sprigs. The petals of the mums almost look like frosty icicles, don't you think?


December 4, 2012

Easy Thanksgiving Table Arrangement


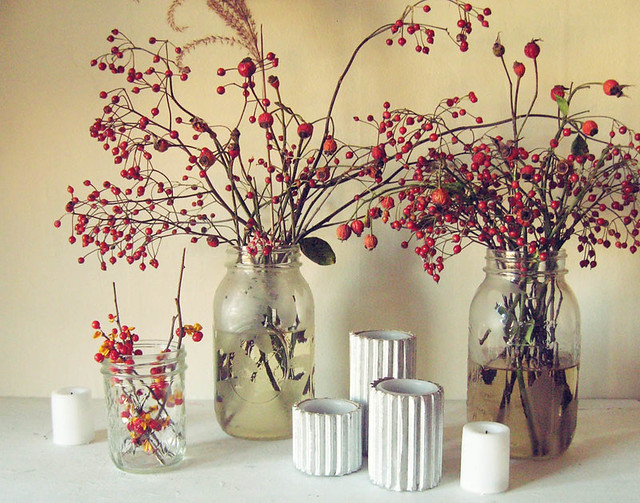
The period between colorful fall leaves and Christmas greenery can be a bit bare when it comes to centerpieces. Stacks of gourds and fruits weren't really in the budget for Thanksgiving, so I decided to gather local berries and seed pods from our garden for my Thanksgiving table instead.

Here I combined two types of rose hips (wild and regular garden roses), a plumed stalk of dried grass, and sprigs of wild bittersweet. I put them in lanterns etched with fall leaves (see my earlier DIY post) and surrounded them with LED flickering candles, some of which were placed in mercury glass-like holders. I'll be posting a DIY for the holders this week!

What did you decorate your table with?

June 1, 2011

Peony "Ice Cream" Cone Bouquet Tutorial


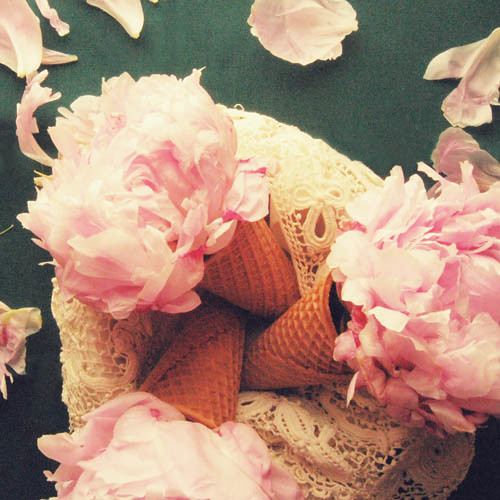
While gazing at a bouquet of enchantingly ruffled, frilly peonies last week, I thought to myself how very much they looked like scoops of ice cream. (I love how this one even has a darker pink "cherry" in the center.) Why not take the resemblance even further by displaying them in sugar cone vases? And so an idea was hatched!

It's actually quite easy to turn a cone of your choosing - could be sugar, could be waffle, could be just plain wafer - into a vase. You could also substitute paper ice cream cups or even cupcake liners!

Here's the tutorial:


You'll need a stack of ice cream cones, one per stem.


And peonies! You can use them at any stage of bloom. They're more rounded before they open (and look just like a ball), but if you use ones that have opened more you get a ruffled, slightly-messily-scooped look. It's a bit more free-form.


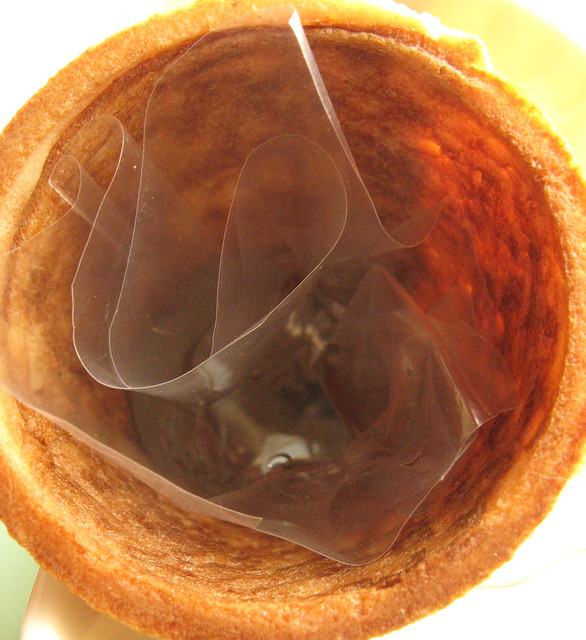
Take a small plastic bag, open it, and push it down into the cone. A pen or pencil is perfect for this. Using a pair of sharp scissors, trim just below the top rim of the cone. The bag will have folds - don't worry about this!

Use tape that's been doubled over (or use the double sided kind) to attach the top outside edge of the bag to the inside of the cone. Two or three pieces should do it! Press the bag's folds against the sides so that you have room to pour water in. (You can tape them flat if you would like - I just left them as is.)

Fill the bag about halfway with water, making sure you only get it in the middle -not inside a fold.


Cut the peony's stem at a 45 degree angle. This maximizes water absorption! Take enough off the length so that the flower sits on top of the cone, but make sure the stem isn't sitting right on the bottom (or it won't be able to drink in water). About one-quarter to a half-inch above the bottom works the best.

Make sure you don't go too short either. I mistakenly did so (leaving about a two-inch stem), and the top-heavy bloom kept falling out of the cone. Longer is better!


If you really want to get fancy and go for a Victorian or Edwardian look, display the cones in a bowl lined with antique lace on a colorful tablecloth, and scatter extra peony petals around the base.


For a more modern and clean look, choose a martini (or other cocktail) glass instead. Wine glasses would work as well. Place two ice cream peony cones inside, on opposite sides for a simple and elegant centerpiece. These peonies would be perfect for a brunch, shower, dinner party, grown-up ice cream sundae night, or just a birthday fete!


You Might Also Like:

Related Posts Plugin for WordPress, Blogger...